Pages

Showing posts with label Food. Show all posts

Tuesday, August 7, 2018

A Week In My Instant Pot, Fuzzy-Brained Post Ruptured Brain Aneurysm Life. ~ Monday

***Update***
It was originally my intention to blog my week. I had taken notes for a few days to turn into posts, but then I got news of the death of a dear friend and I was not in a fit state of mind to blog******
******


In May 2016 I suffered a ruptured brain aneurysm, I survived and I'm alive which is its own special miracle. The way I see it, I'm living on bonus time and I intend to make the most of it!

Post rupture, my brain isn't what it used to be. I'm still smart, I'm still me... but I spend a lot of time spinning my wheels trying to remember what I'm doing, feeling confused and finding my place again. Things take me longer and I can't multi-task the way I used to.  I care for my adult autistic son who is in constant need of attention, so whatever I'm doing, I'm also answering his queries and comments. So that's already two tabs open in my brain at any given time - one tab more than I can really handle.

I thought I'd try to share a week in my kitchen life. Share the adaptations I've found for getting food on the table in my house.

Instant Pot - I'm not going to teach you to use an Instant Pot or which one to buy. There are tons of resources out there. I will share some of my favorites with you and I'll link recipes when possible. I have always liked to cook and I like to understand WHY things work and HOW they work. I've heard from a lot of people who used to hate to cook that the Instant Pot has changed their life.  It's changed mine too. I always liked to cook and now it's even easier.

Some resources

  • https://thisoldgal.com recipes and how to's for Instant Pot and Air Fryer - she also has a facebook community
  • https://www.hippressurecooking.com Laura Pazzaglia is a Pressure Cooking Expert. She has been an advisor and consultant to several Pressure cooking companies and has even helped develop some of the recipe books that come with them. Her website is a TROVE of pressure cooking info with tables for cook times, news about what's new in pressure cooking, recipes, and don't miss her YouTube series Pressure Cooking School.
  • https://www.facebook.com/groups/InstantPotCommunity/ Instant Pot (brand) Facebook Community - be sure to read the participation rules and search the group to see if your question has already been answered (it probably has been discussed in detail and if you you'll have an instant answer). Here's how to search a Facebook group. See that magnifying glass icon at the top of the image with the F to the left of it. You search there to search ALL of Facebook to find groups or people.
    Once you belong to a Facebook Group (it only seems to work for groups) If you look down the left hand column you'll see the magnifying icon again and it says "search this group" that is where you can do a search to look for specific information within the group. This is the way it looks on a computer, if you are using a mobile device it will look different, but once you know to look for it, you can find the search in group field.

Monday

Sunday night I got home from a 2 week trip out-of-state. On Monday I needed to get the dishwasher emptied (load of dishes I ran before I left) and the sink of rinsed dirty silverware & dishes my husband used while I was gone into the dishwasher and running.  I had done a quick market run Sunday night and replenished a few staple perishables.  While I cleaned the kitchen I got a batch of hard-boiled eggs going for my son to eat as snacks during the week.

Hard Boiled Eggs in the Instant Pot
I began with this old gal's recipe for instant pot hard boiled eggs and I have adapted it a bit. You will see all kinds of directions for how to do this. I think it must have to do with your specific machine (electric pressure cooker) and the size of eggs you use.
I'll link to This Old Gal's recipe https://thisoldgal.com/pressure-cooker-easy-hard-boiled-eggs/ and tell you how I do it. But I don't have the brain capacity to trouble shoot a bunch of what if and how to questions. There are bloggers and Facebook groups that are much better equipped than I, to cover that. 

Pressure-cooked eggs peel so easily the day you cook them. When I hard boil eggs in my Instant Pot I place the trivet that came with the pot in the bottom. I fill the pot with 1.5 cups of water (the minimum amount my pot is supposed to need to come up to pressure according to the instructions that came with my pot). I have a steamer basket that came with a stove-top pressure cooker years ago and I place my eggs in that steamer basket and set it on the trivet (Amazon is full of options for steamer baskets and egg racks and This Old Gal even has links to ones that she particularly likes).  I place 10 large eggs in the basket. Seal the lid and close the steam valve. I set my pot for manual setting - I verify that it is set to High Pressure and set the time to 3 minutes (that's how long the eggs will cook once the pot comes to pressure and the pressure indicator pops up. When the cook time is complete the pot will beep and turn itself off. I a set a timer for an additional 7 minutes to allow the eggs to continue cooking as the pot cools down. After 7 minutes I release the pressure. I remove the eggs from the pot with tongs rap them each once on the counter to break the shell and plunge them into a bath of ice and water to stop the cooking.  There they sit until they are cool enough to peel usually 30 minutes or more. If I notice all the ice has melted, I add more ice.

When the eggs or cool, or I get to the stage of cleaning my kitchen where I have freshly scrubbed my sink, I peel the eggs under running water. I store the peeled eggs in a mason jar with water to cover the eggs in my refrigerator.  The sulphur from the eggs will continue to leach into the water, you can change to fresh water after a day or two if you like.


Meanwhile I started to unpack, saved a baby bird from my puppy out in the yard. Locked the dog inside so the baby bird could recover, tried to build a ladder out of chicken wire so the baby bird could return to the tree. Filled my son's pill container with his vitamins and medications for the week. I Continued to take the dog out on a leash all day so she wouldn't eat the baby bird. I also unboxed a printer that I ordered for my craft room back in February (I had been waiting until after the new window installation to set it up). I got the printer onto the cart, installed all the ink and began the initial set-up while dinner cooked.  I'm sure there were other things, but that's what I remember.

Here is what I made for dinner.
I cooked a pot of basmati rice on the stovetop (I probably could have done it in my instant pot while the chicken cooked, but I forgot). I made Butter Chicken out of a cookbook. I used chicken thighs and I ended up blending it in my blender because I have the 8 quart instant pot and the sauce wasn't deep enough in the pot so my stick blender was splattering everywhere. I used butter and whipping cream because I had purchased them to use in the recipe but next time I will try using the suggested alternatives of coconut oil and canned coconut milk as these are both things I have in my pantry.
https://twosleevers.com/instant-pot-butter-chicken/
Dinner took much longer to make because I had to search my whole spice cupboard for all the spices. When I got ready to cook, I realized that I had been looking at the wrong recipe. My ingredient list was much shorter, but somehow this detour took me about 45 minutes because my brain was in a  confused state. As a result it was quarter to 8 when we sat down to eat dinner, but everyone agreed this recipe is a keeper.

The recipe is in this cookbook, which I accidentally bought for Kindle (usually I buy physical copies of cookbooks) but when I realized my error I decided to try it on Kindle (and my Ipad) and see how I like it.


https://smile.amazon.com/Indian-Instant-Pot-Cookbook-Traditional/dp/1939754542/ref=sr_1_1_sspa?ie=UTF8&qid=1533650952&sr=8-1-spons&keywords=indian+instant+pot+cookbook+by+urvashi+pitre&psc=1

Friday, January 15, 2016

Cook Smart: Prep Once Cook Twice - using your freezer to advantage.

In the interest of more GRACEful living in 2016 I will be bringing you a series of posts which share some of my CookSmart strategies which make it easier to get home cooked meals on the table on a regular basis.

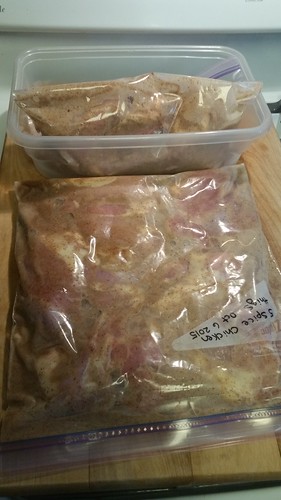
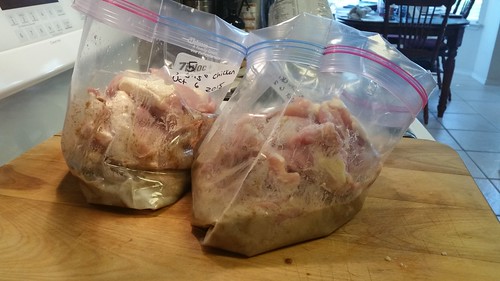
It's almost as easy to prep 2 meals in a marinade as it is to prep one. Tonight I'm making Five Spice Coconut Chicken for dinner, but I purchased double ingredients and I prepared a second batch at the same time as the first. An added benefit of this method is that before the meat freezes, then again as it defrosts it is also marinating so you get very flavorful results.

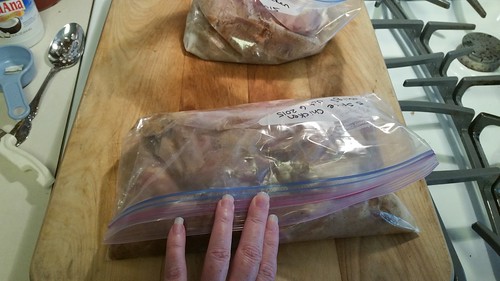
Label 2 one gallon freezer bags.
2015-10-06 15.08.12 2015-10-06 15.08.55
Add marinade ingredients to each bag, smoosh the bags to mix, then add chicken to each bag.
2015-10-06 15.26.30 2015-10-06 15.26.57
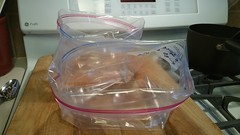
Turn the bag over on itself and press out any excess air, then seal.  I place one in a shallow container in my refrigerator, and the second I spread out flat & freeze for a future meal.
2015-10-06 15.28.59 I find that things defrost more quickly when they're frozen flat this way, because they are thinner. I also measured my 9x13 baking dish and found that it's max capacity is 1 liquid gallon. So Anything I can freeze in a one gallon bag, ought to fit into a 9x13 casserole dish for baking, this opens up all kinds of possibilities for freezer meals.

Also See: The Case For Making Meal Planning A Priority
Preparing Casseroles for the Freezer
Recipes which work well with this method:
No Leftovers Fice-Spice Chicken
Easy Picnic Chicken


Thursday, January 14, 2016

The Case For Making Meal Planning A Priority

"Everybody wants to get out to the gym, and that's a good thing too, but if we took as much time in our day to plan our meals and prepare them and maybe bring along a healthy food supply for the day. Then we wouldn't be at the mercy of the grab and go and whatever's out there and it would be so good for our bodies as a whole and we could probably get, (again I'm biased, exercise is great but being a clinical nutritionalist and knowing the outcomes that I have seen over the years) more mileage out of paying better attention to our diet every day."

The above quote is an excerpt from an interview with
Geri Brewster RD MPH CDN, a registered dietitian-nutritionist
from from the Autism Intensive Summit (January 10-18 2016)
I'm getting so much out of this informative online event!
You can register for this free limited time event at the link below.

http://theautismintensive.com/

Meal Planning On The Fragrant Hand

Tuesday, January 12, 2016

New Slow Cooker

I got a new slow cooker for Christmas. Today I tried it out. I made Slow-Cooker Chinese Barbecued Pork from Cook's Country - October/November 2013 issue. http://picasion.com/
http://picasion.com/

Friday, November 8, 2013

Make-Ahead Migas Breakfast Casserole

Now that Ethan is in high school the bus picks him up before the sun. In the interest of smoother running mornings I've been trying to utilize a lot of breakfast casseroles that can be baked Sunday night & re-heated throughout the week.

I wanted to come up with a casserole take on our favorite variety of migas inspired scrambled eggs. I knew I would need to solve the dry eggs issue in a casserole that was intended to be reheated in the microwave each morning. I remembered that my Aunt Virginia (a caterer) once told me the key to keeping eggs from drying out on a buffet was cream cheese. I've now made this casserole twice & it seems to be the current favorite.

Please be advised if you use a lower fat milk you may have issues with the casserole getting watery on you. The half & half is there in order to create an emulsion. For an explanation of why achieving emulsion is important in egg dishes please see Perfect Scrambled Eggs Made Easy.

For serving I cut a square, re-heat it in the microwave, then top it with taco sauce & sour cream.
2013-11-07 21.58.00
Make Ahead Migas Breakfast Casserole

Chunky Filling Items
10 corn tortillas cut into pieces & fried
Ham I like to use a lot
1 onion, chopped fine
1 green bell pepper, chopped fine
1 can ortega chilis
2 cups of shredded cheese, I like cheddar, jack or a combination of the two

Egg Mixture
1 8 oz package cream cheese softened
8 eggs added 1 at a time
1/2 teaspoon salt
2 cups half & half or whipping cream
2 green onions (optional)
a handful of fresh cilantro (optional)

Remove cream cheese from refrigerator so that it can begin to soften.

Cut 10 corn tortillas into strips. Fry the strips in batches, in oil for about 2 minutes flipping them over half way through (they'll fry best if you wait to fry until your oil is between 350 and 375 degrees fahrenheit.) Drain fried tortilla strips on paper towels. To skip this step you could substitute tortilla chips but they will be much saltier, and I suspect greasier and containing more preservatives. Or you could use un-fried tortillas, but they will soften & disintegrate in the casserole giving a very different texture.
2013-11-07 19.11.552013-11-07 19.44.32
For breakfast ham I have used several different types depending on what was available at my market at the time. Sometimes I can find small sliced boneless hams that have been shrink wrapped, these are very easy to work with. Last night I had a ready-to-eat picnic ham, it was difficult to work with because of the fat cap & trimming around the bone. I wouldn't go that route again. Sometimes ham steaks are available in my meat department they are also quite easy to work with. Failing the above I get ham from the service deli. I have them slice it on the thickest setting & I get 2-3 slices depending on the size of the ham. The ham from the deli is the easiest option, but depending on the season other hams may be a better price. 

Place ham slices in a large skillet and heat them up, allowing them to brown a little bit on each side. Browning the ham seems to activate the flavors of the ham. Try an experiment & eat a piece of ham before browning, then eat a piece that has been browned. HUGE flavor difference! 
Remove the ham to a cutting board, stack & cut into bite-size pieces.

2013-11-07 20.02.432013-11-07 20.09.39
Add a bit of olive oil or butter to the skillet you used for the ham & saute the onion & bell pepper until soft. I like to use a bamboo paddle or wooden spoon and scrape up the brown left in the bottom of the pan from the ham. Ham flavored veggies is a good thing. When the veggies are soft, mix in 1 small can of mild Ortega chiles. I didn't add chiles to my 1st casserole & I felt it really needed this specific flavor.
2013-11-07 19.56.572013-11-07 20.11.58
Spray a 9x13 baking dish with non-stick spray. You can mix all the chunky filling ingredients with the cheese in a bowl & dump into the casserole dish. Or save yourself the washing of a bowl & add each ingredient to the casserole dish as you prep them, then take a pair of tongs & mix them right in the casserole dish.
2013-11-07 20.13.042013-11-07 20.22.45
Now for the egg mixture. You need to incorporate the cream cheese throughout the eggs, you want to form an emulsion, mix them evenly, not chunks or bits. There are 2 ways to accomplish this.
1) Cream the cheese in a mixer & when it is soft add the eggs 1 at a time mixing until creamed into the cheese (1st photo is after all eggs are added), then add salt, and slowly pour in the half & half or cream while the mixer is running.
OR
2013-11-07 20.18.332013-11-07 20.20.522013-11-07 20.18.28
2) If you have a really good blender like a Blendtec or a Vitamix, you can mix up everything in your blender.
I have made this casserole both ways & both work.
Because I DO have a blendtec blender and I know it will blend evenly I also add 2 green onions cut in half to the blender jar. They gave great flavor. Last night I used the creaming mixture method but I wanted to incorporate some leftover cilantro I had in the fridge so I blended my half & half with the cilantro before adding it to the egg mixture. The cilantro was very subtle but if you have some handy, go ahead & add it.
2013-11-07 20.23.062013-11-07 20.23.22
Pour the egg mixture over the chunky filling ingredients in the casserole dish. I take a pair of tongs & lift up bits of the filling from the bottom in order to allow the egg mixture to flow in and around the ingredients so that I don't end up with chunky stuff on the bottom & eggs on the top.
2013-11-07 20.23.53-1
You could top the casserole with additional 1/2 cup of cheese if desired I don't find it necessary.

Cover with foil Bake in a preheated 350 degrees Fahrenheit oven for 1hour 10 min. Remove foil & continue baking for 10 more minutes.

If serving hot allow to cool for 10 minutes before cutting & serving. Or allow to cool, cover with foil & store in the refrigerator for future use.
2013-11-07 21.58.44

Wednesday, November 21, 2012

Happy Thanksgiving Eve!

Are you cooking? I'm cooking, but I'm not cooking what I should be cooking. Here's a slide show of putting together TONIGHT'S dinner when I really should be making Turkey side dishes.
 
Happy Thanksgiving! May your turkey be juicy and your sides so delicious that your mother-in-law asks for your recipe. May none of it end up on your thighs.

Friday, June 8, 2012

More Meal Planning - WorkFlowy & Recipe Listing

Sometimes I try a new recipe & really like it, then after time passes, I forget which magazine, cookbook or website the recipe is in.  So now when I decide to add a recipe to my regular repertoire I add the name & source on my workflowy recipe listing.

Here's how it looks in the collapsed listScreen Shot 2012-06-08 at 4.56.56 PM
Here's how it looks when I open the Recipe bullet on it's own page. Screen Shot 2012-06-08 at 4.53.38 PM

Monday, May 21, 2012

Menu Plan Monday & My Meal Planning Process

I have a new meal planning process that I thought I would share.

I don't assign meals to specific days of the week. I choose a few meals that I'll make during the week, this leaves me wiggle room. Since my husband seldom eats dinner at home, I end up with leftovers & plan fewer meals. This way I'm planning for what is likely to happen & I don't end up having to toss food that's past it's expiration date.

I've recently begun using the website http://www.workflowy.com for organization. I've integrated it into my meal planning.

This week I began with leftover meat in  my fridge (sale meat for which I had no specific plan when I bought it.)  I listed the meat including the sell by or use by date so that I could easily remember what I had without having to go look in the meat bin of my refrigerator. I also have a link to my grocery list so that I can get there quickly. I mark each meal as completed as I make it (I liked to see items crossed off the list.) The next week when I make a new plan, I delete them. With Workflowy you can choose if you want to display or hide completed items.

Screen Shot 2012-05-21 at 10.19.19 AM

This week I have leftover turkey sausage & chicken breasts so I set about meal planning based on those items.  I've added the recipes I will make with each dish & where to find them.

******(Update I no longer use this app or website, it stopped working, it wouldn't sync and started saying certain items like onions were already on my list and simply would not add them!)********
While I was building my meal plan I also have a tab open at http://www.groceryiq.com - This the grocery/shopping list app that I use on my phone. I love it because it's available for Android, iPhone (& iPad), Blackberry & as a website. I have it on my phone (android), my iPad & iPod Touch, and I've shared my list with my husband who has the app on his Blackberry. I can add to my grocery list no matter what device I have in my hand when I think of items to add, and it will be synced to all my devices. I can also send my list to an email address or print it from the website. Grocery IQ has a barcode scanner, so when I run out of a pantry staple I scan the empty box using my phone camera - and it adds that item to my grocery list. I've also found it's handy if my husband goes to the store because he may not know which type of Ritz crackers I buy, but if I've scanned the item it lists specifics and usually shows a picture.
Screen Shot 2012-05-21 at 10.22.46 AM
Screen Shot 2012-05-21 at 10.22.20 AM
So I've added to my grocery list & will take my phone with me to the market when I go shopping. I used to use a paper list, but I was often losing it, or forgetting to take it with me, thinking of items to add to it while I was at the doctor's office, or leaving it sitting on the seat in the car, in the parking lot of the supermarket. Keeping my grocery list on my phone has been a great solution for me.

This week I chose 1 cookbook - The Pioneer Woman Cooks by Ree Drummond, and a stack of 3 magazines. I knew what my meats were so I looked through the indexes (I love magazines with a recipe index in the back!) for recipes that used those items. When I wasn't finding anything for boneless skinless chicken breasts that tickled my fancy & went well with the potatoes I wanted to make, I searched for chicken recipes on http://www.cookscountry.com a site with which I have a paid membership. The quality of the recipes on this site make it worthwhile (to me) to pay a membership to have access to their full history of recipes (I believe that access to recipes from the current season of their program is free.)  I don't like to waste my time with recipes that turn out to be no good and I find that sites with user submitted recipes have a large percentage of those. I guess I'm picky.
Screen Shot 2012-05-21 at 10.54.52 AM
I'm on Menu Plan Monday at http://orgjunkie.com/blog

Friday, May 18, 2012

Quick Weekday Migas

This is the new favored breakfast dish for school mornings in our house. Boy and Mama are equally enthusiastic so I thought I'd share it with you.
IMG_0806.JPG

2 eggs
salt
cream or half & half
tortilla chips
taco sauce
shredded cheese
butter or olive oil
ham (optional)

Beat the two eggs in a bowl with a dash of salt then add the cream or half and half (if you use milk you will get watery eggs - see my post on Perfect Scrambled Eggs for why.) Don't skip the salt, it goes a long way to eliminating that sulfer egg taste.
IMG_0795b.JPGIMG_0797.JPG

Crumble in a handful or two of tortilla chips, a squirt of taco sauce, and a pinch of finely shredded cheese. (A small amount of shredded cheese mixed into the eggs while cooking will melt and flavor throughout instead of just sitting on the top getting rubbery - it's a good way to get the flavor with fewer calories & fat.)  If I have the time I like to go make coffee at this point to let the tortillas soften up a bit in the egg mixture, some mornings I don't have the extra time, they still taste good if you don't.
IMG_0800.JPGIMG_0801.JPG

Add diced ham to and 8 or 7 inch omelet pan, if you are using it. I buy a large ham at the market & use it for breakfasts over the next 2 weeks or so. If I plan to make it into eggs I dice up a few ham steaks and keep the dice in a zip-loc bag ready for using with eggs.  If you saute the ham in the pan a bit it will bring out more flavor.  When the ham is hot, add 1 tablespoon of butter to the pan.  Make sure you have a puddle of butter (or oil) that covers the bottom of the pan & pour the eggs into it.
IMG_0802.JPG

When the edges of the eggs are just set, take a heat safe silicon spatula and pull 3 edges toward the center (See Scrambled Egg Post).  When edges are set again, repeat.  Now turn up the heat in the pan, when the full underside of the eggs looks puffed, turn the eggs. It will break into pieces, just turn each piece, if you wait until you can turn all the eggs in one piece your eggs will get dry.
IMG_0805.JPG

The eggs will be done nearly as soon as you flip them, turn them out onto a plate, if you leave them in the pan, they will overcook.

Serve, you can add your choice of condiments, some ideas include: taco sauce, salsa, sour cream, avocado slices, guacamole - you get the idea.


Thursday, January 19, 2012

Oven Broiler Sandwiches

You don't have to have a panini press to make delicious hot toasty sandwiches at home. I actually DO have a panini press but sometimes I don't want to get it out, or clean it, or add the calories of extra butter or olive oil on the outside of the bread. I have been making oven broiler sandwiches for years, and they are oh so tasty! This is also a good way to make a large batch of sandwiches at one time. This is a great quick meal for Sunday afternoon when we get home, starving & everyone wants lunch QUICK.
IMG_0590e.JPG
I used:
Mortadella as best I can tell it's facy Italian bologna Boar's Head makes a wonderful one, it has bits of pistachios in it. Yumm! You want it sliced very thin.
Genoa Salami - much nicer than hard salami you want one that is a nice deep color, some of the supermarket brands are almost pale pink, they're not as good. Private Selections at Kroger is of a good quality.
Pepperoni - you just can't go wrong with a bit of spicy pepperoni on your sandwich
Provalone is my cheese of choice - but I was out so I used what I had in the fridge, today.
You can also add some ham (which will make the sandwich sweet)
or Turkey (using more turkey and less of the higher fat sausage meats will help the sandwich have fewer calories)
Tomato also makes a nice addition.
I used Sourdough bread, but any kind of bread or roll works well.

IMG_0583e.JPGIMG_0584e.JPG
Mix up some mayonnaise with Italian Salad dressing and spared it on the bread.

Next I like to add a layer of cheese, this helps the meats adhere to the sandwich & not slip & slide around as much. If you're going to use tomato, add it next. Then add the deli meats, ending up with a bit more cheese, which will serve as sandwich glue.
IMG_0585e.JPG
Position the sandwich halves on a foil lined baking sheet & position under the broiler until the cheese gets melty and the edges of the meats begin to crisp & curl up, you're going to love the way this brings out the flavors of the meat.
IMG_0587e.JPGIMG_0592e.JPG
Now add any mustard, pickles or other dressings you desire. I drizzled in a bit more of the Italian mayo dressing. Put the two halves together and return to the broiler until the bread is toasted, flip the sandwich over & repeat.

The possibilities are endless with all the different combinations of meat, cheese, veggies, spreads & condiments. Go forth & create your own winning combination!


Friday, January 13, 2012

Chicken Stew With White Wine: Master Recipe Becomes - Chicken & Dumplings, Chicken Noodle Soup or Chicken Pie

Updated Feb 18, 2013

 This recipe comes out of Jamie Oliver's Food Revolution (Amazon Affiliate Link at bottom of post) It's his Basic Stew recipe the Chicken and White Wine variation. Jamie's base recipe calls for a can of tomatoes, I leave those out, my idea of Chicken comfort food doesn't include tomatoes. My family loves this recipe I have now made it as Chicken & Dumplings & Chicken Noodle Soup. It would also make a wonderful chicken pot pie. I used to make it with boneless chicken breasts, but after using boneless thighs, I will never go back. The thigh meat requires some trimming away of fat, but the results are worth it. The thigh meat remains tender & juicy, by comparison chicken breasts seem a little tough & dry, particularly in leftovers the next Day. As for the wine, I have used Chardonnay, Sauvignon Blanc, Dry Vermouth & Sherry all are fine, it seems that just about anything that's light in color will do. This recipe can be made on the stovetop or in the oven. I prefer the oven as it produces a gentler, all over heat & I don't have to adjust the temperature as I would on the stovetop. Be sure that the pot you use is oven safe, you don't want to melt your handles.
IMG_0486.JPGIMG_0582.JPG

Basic Stew Recipe Chicken With White Wine


2 Tablespoons of olive oil
2 onions, finely chopped
2 carrots, peeled & sliced (I sometimes use 3 or 4 it adds more color)
2 celery stalks (use up to 4, celery adds a lot of flavor)
3 sprigs of fresh thyme
1 chicken bouillon cube (I use Knorr – this item is my addition)
1 Tablespoon of flour (see the variation you are making for possible alteration)
1 – 2 pounds of boneless skinless chicken thighs, trimmed & cut into pieces
2 cups of white wine
2 cups of chicken broth or stock (this makes up for the liquid in the can of tomatoes I omit)
1 teaspoon of salt
pepper to taste

If using your oven move position a rack in the center of the oven & preheat to 350 F.
IMG_0474.JPGIMG_0475.JPG
Add the olive oil to a large dutch oven or stock pot & heat over medium heat. When the oil is hot add the veggies to the pan and cook until softened, about 10 minutes, stirring occasionally as needed (I like to use a bamboo paddle for this purpose) When the veggies are nearly ready add the thyme, bouillon cube and flour and stir frequently to cook off the raw taste of the flour.
IMG_0476.JPGIMG_0477.JPG
Add the chicken pieces to the pan & stir. Add the white wine, chicken broth, salt & pepper, stir and scrape up any brown bits on the bottom of the pan, they add flavor. Increase the heat if needed and bring to a bubble. Place the lid on the pot & either place in the oven, or reduce the heat to barely a simmer. Cook for 1 and ½ hours more (see notes for the variation you are making.)
Serves 4, generously
IMG_0478.JPG


Chicken & Dumplings
If you want a thicker stew you can add an extra 2 teaspoons of flour at the stage where you added the flour (for a total of 1 Tbs + 2 teaspoons)
30 minutes before the stew is due to be removed from the oven remove the lid & check on it. Add more liquid if desired. It's now time to mix up your dumpling batter. I use Bisquick Baking mix & follow the directions on the box which calls for 2 cups of baking mix to be mixed with ¾ cup of milk (I use lactose free milk since I have some dairy issues.) Mix it up in a bowl with a fork. Pull the pot out of the oven & add dumpling batter to the top of the stew liquid – a large ice cream dipper works wonderful for this purpose & produces uniformly sized dumplings. Cook on the stovetop (or return to the oven) uncovered for 10 minutes. Then replace the lid and cook for an additional 10 minutes. Ladle into large soup bowls and enjoy!

You may have misgivings about using Bisquick but that's how my Aunt Virginia always makes them, and she was a caterer. If it was good enough for her, it's good enough for me – and it produces wonderful fluffy dumplings.
IMG_0480.JPGIMG_0482.JPG
IMG_0484.JPG

Chicken Noodle Soup
For Chicken Noodle Soup check on the pot 30 minutes before it will be ready (after 1 hour of simmer time) Depending on how much broth is in the pot you may wish to add more chicken broth at this point. The soup will thicken a little bit after you add the noodles as they will add starch to the water.
I find that 3 oz of dried fettuccine noodles broken into 4 pieces produce the amount and size of noodles that I like. Add them to the pot at the 1 hour and 10 minutes point & return to oven with the lid on (or continue to cook on the stove-top, covered) until the noodles are soft, then serve. I found my noodles were ready after 20 minutes of cooking in the oven.
IMG_0582b.JPG

Chicken Pot Pie
Add 1 Tablespoon of flour at the point where you added the flour (2 Tablespoons total). When the stew is ready remove thyme stems, add 1 cup of cream & 1 cup of frozen peas. Remove from heat and allow to cool (hot stew will make the pie crust melt and fall into the broth, then it will not get crisp.)
Roll out pie dough to the size of dish you are using for your pie (be it one large pie – or two individual pies) I find that rolling together 2 rounds of Pillsbury refrigerated pie dough produces a thicker crust that is hearty & pleasing for chicken pie. Place dough on top of dish & crimp, then cut 4 or more slits in the dough to allow the steam to vent away brush with milk. Bake until browned and done, consult your pie dough recipe for an idea of how long and what temperature to bake.

A short cut to Chicken Pot Pie is to cut shapes or rounds out of the pie crust, brush with milk & bake on a baking sheet. Serve the stew in large bowls & float the pie crust shapes on the top. This is a great way to prevent having soggy pie crust if you're serving again as leftovers.
(photo coming soon Chicken in White Wine with Cream & Pie Crust Crackers.)