https://scraphappy.org/blog/2021/01/21/refreshing-with-new-colors/
Showing posts with label Card. Show all posts
Showing posts with label Card. Show all posts
Thursday, January 21, 2021

Tuesday, December 29, 2020
Reindeer Flip-It Card


Joyful Patterned Paper
Just Because Patterned Paper (Oct 2019 Kit Club Box)
Reindeer2Stamp Stamps & Dies
Exclusive Flip-Its Card Circle
Eyelet Scallop Circles Die Set
Ribbon from Kit Club Box
Close To My Heart Cranberry Ink Pad & Cardstock
Art Glitter Glue
Stickers
Picket Fence Studios Holiday Hopper Sequin Mix
Dimensional Stickers The Paper Studio Hobby Lobby
Sunday, December 20, 2020
Folk Art Card


Christmas Folks Stamp Set and Northern Winter Cover plate by Hero Arts
Minc Foiling toner sheets from Heidi Swap
Catherine Pooler Alpine Village and Tiny Wishes
The Stamps of Life Borders Dies
Stamparatus Stamping Platform from Stampin' Up!
Sponge Daubers


FROM OUR HOME TO YOURS was one long stamp. I broke it up to appear on 3 lines on different panels but using a Stamparatus stamp positioning platform. I positioned the stamp as needed on the card. Use the door of the platform to pick up the stamp then partially inked the stamp only the words I wanted to stamps with a sponge dauber I also wiped off excess ink with a paper towel before stamping.


Thursday, August 20, 2020
Scrap Happy Creative Team - My first post is live
My first post is live today over on the Scrap Happy Layout A Day blog. Hop on over and give it a look!
https://scraphappy.org/im-fine-because-were-connected-keeping-positive-through-craft-and-community/
Here's a sneak peek of what I created.

Wednesday, July 8, 2020
I'm Now A Hobbyist demonstrator with Stampin Up!
I'm giving it a try. Here's the image for the July Paper Pumpkin (subscription project kit) for July.
Here is my website for shopping https://aprilswingler.stampinup.net/

Here is my consultant subscription link for Paper Pumpkin
Here is my website for shopping https://aprilswingler.stampinup.net/
Sunday, May 31, 2020
Wonderful Windmills Card
This card makes me happy. Incredibly happy. I have not sent it to anyone yet because I am not yet ready to part with it. It is still brightening MY every day sitting on top of my die-cutting cart.
Cutting dies used are Wonderful Windmills (exclusive class set of dies) from The Stamps of Life. Card base is Royal Stand Up Card by Stephanie Barnard for Sizzix. Grass from Mushrooms2Stamp Dies also from The Stamps of Life.
Patterned paper is from The Paper Studio at Hobby Lobby. Solid cardstock from Close To My Heart and The Stamps of Life.
Let me tell you about the glue that changed my life. I know I can't believe I typed that sentence but we
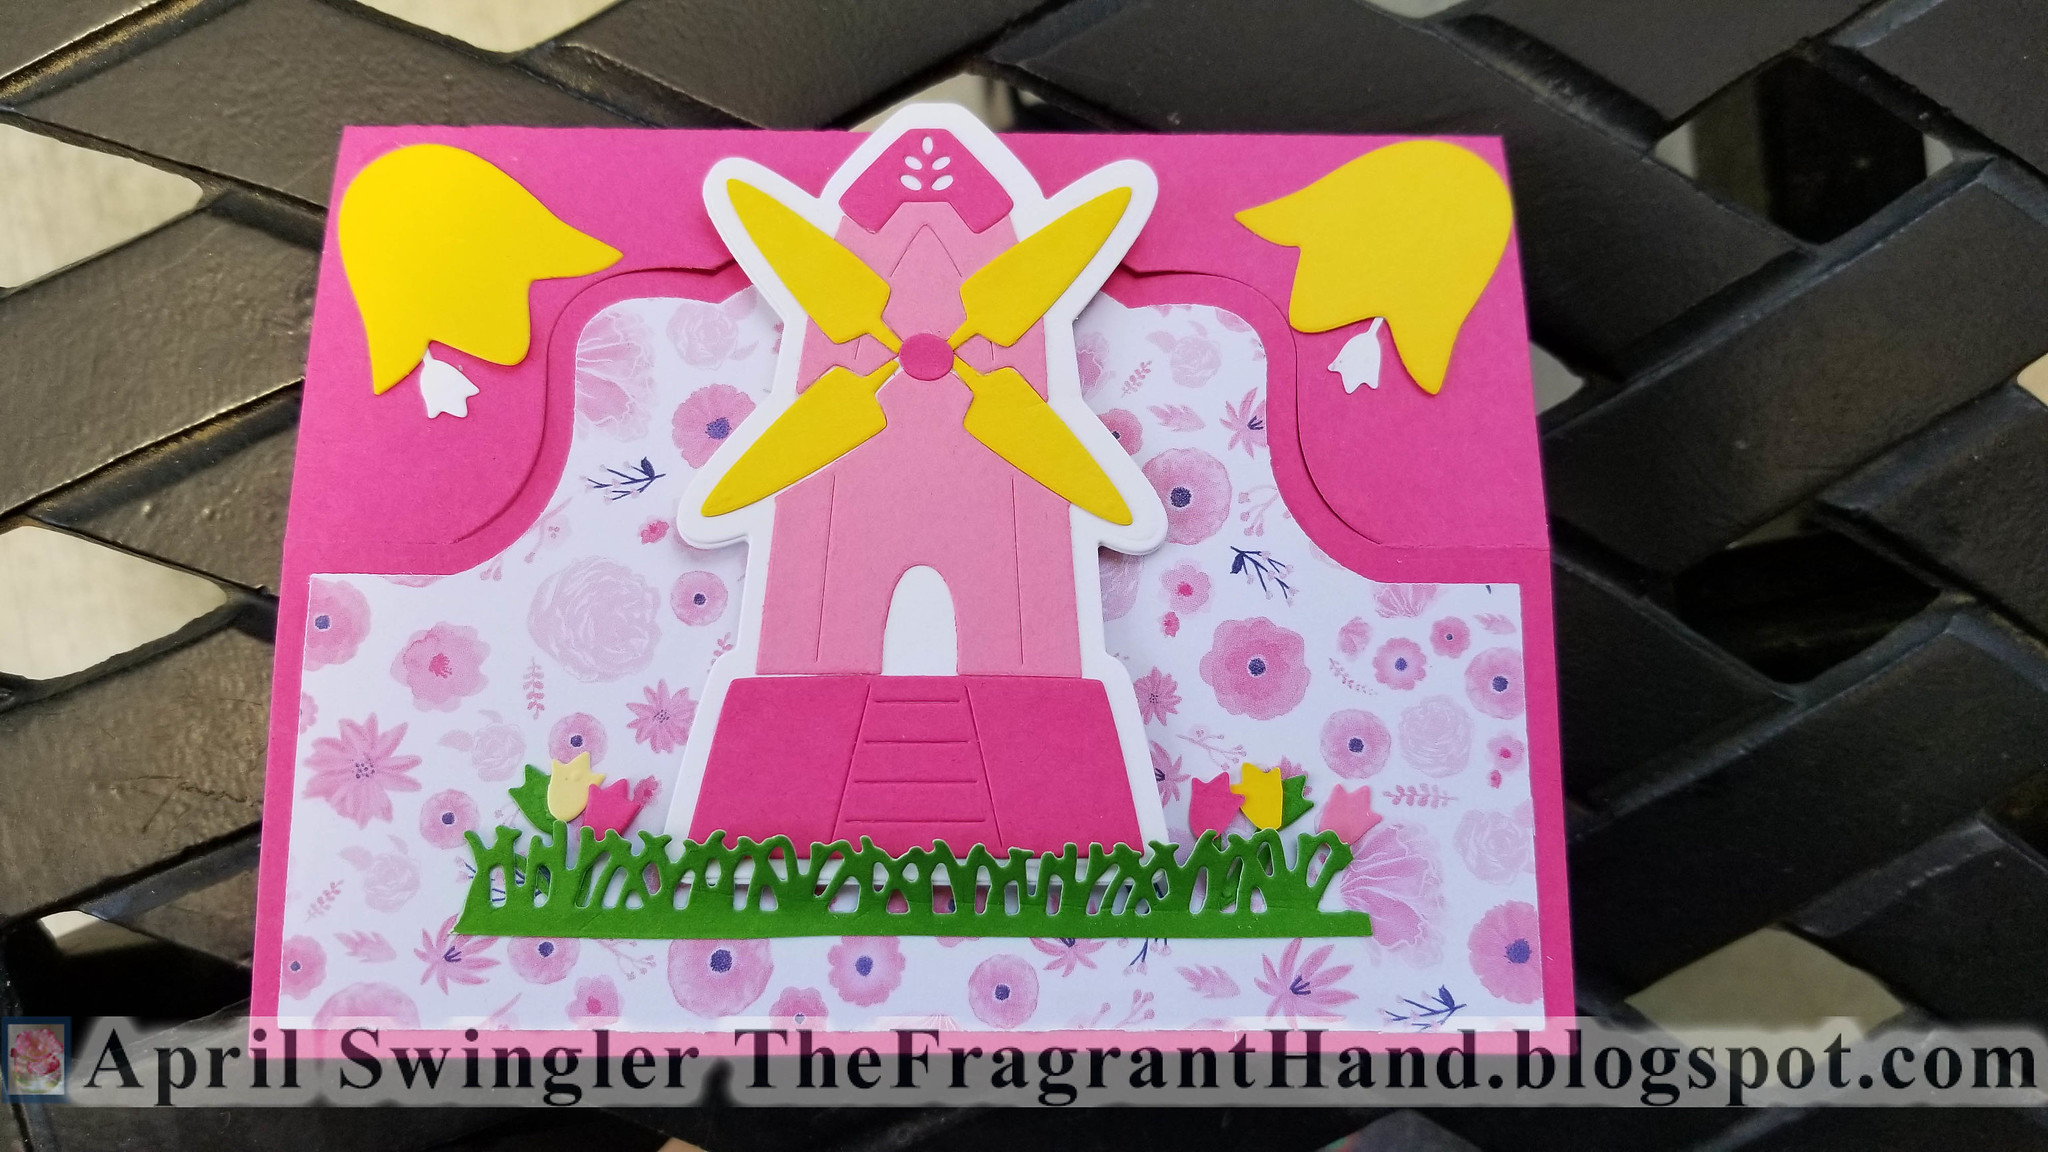

Let me tell you about the glue that changed my life. I know I can't believe I typed that sentence but I did and I'm not even going to backspace it away. So there's this glue. Art Glitter glue. It's liquid glue, it has this fine tip applicator that doesn't clog because it comes with a pin to go in it. It dries fast. Like I use it to put together paper boxes and fiddly 3d items. But it also doesn't dry TOO fast. If I put something on crooked I have a moment or two to straighten it and fix it. Nothing pops off the card later when you use this glue. It's fabulous! It dries clear and unlike glossy accents, it comes off my fingers pretty easily. I've heard if this glue gets too cold it clumps and becomes useless so you don't want to order it during cold weather where it might freeze while shipping- so I'm told. So this glue works so wonderfully it has replaced ALL my other adhesives, I just use this. A little goes a long way, it doesn't make my paper bubble. I have yet to find a downside to this glue. My tape runners are not getting used any more. Art Glitter Glue (there's not glitter in it).
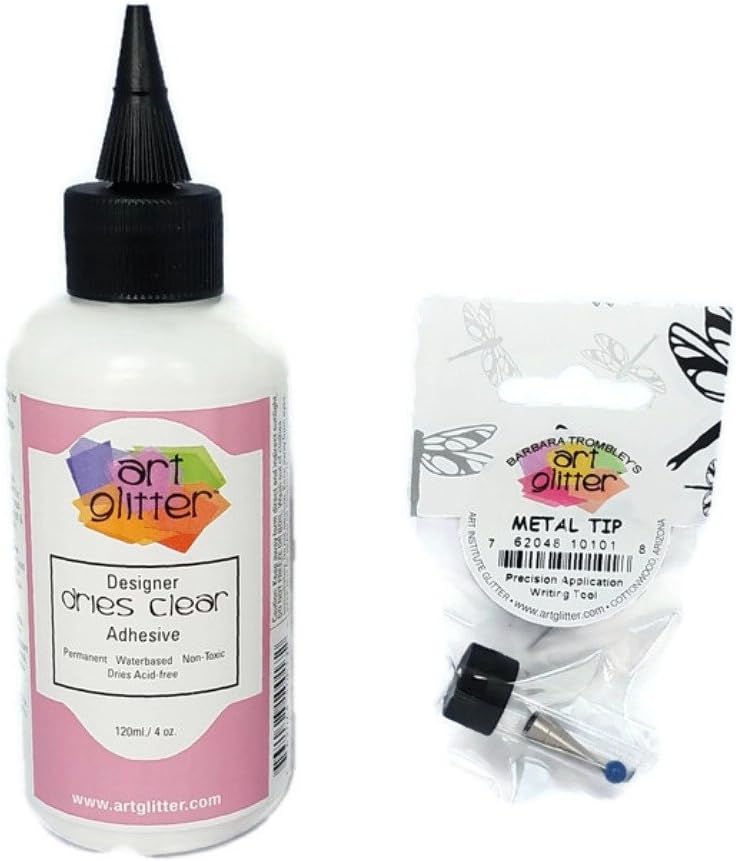
Cutting dies used are Wonderful Windmills (exclusive class set of dies) from The Stamps of Life. Card base is Royal Stand Up Card by Stephanie Barnard for Sizzix. Grass from Mushrooms2Stamp Dies also from The Stamps of Life.
Patterned paper is from The Paper Studio at Hobby Lobby. Solid cardstock from Close To My Heart and The Stamps of Life.
Let me tell you about the glue that changed my life. I know I can't believe I typed that sentence but we
Let me tell you about the glue that changed my life. I know I can't believe I typed that sentence but I did and I'm not even going to backspace it away. So there's this glue. Art Glitter glue. It's liquid glue, it has this fine tip applicator that doesn't clog because it comes with a pin to go in it. It dries fast. Like I use it to put together paper boxes and fiddly 3d items. But it also doesn't dry TOO fast. If I put something on crooked I have a moment or two to straighten it and fix it. Nothing pops off the card later when you use this glue. It's fabulous! It dries clear and unlike glossy accents, it comes off my fingers pretty easily. I've heard if this glue gets too cold it clumps and becomes useless so you don't want to order it during cold weather where it might freeze while shipping- so I'm told. So this glue works so wonderfully it has replaced ALL my other adhesives, I just use this. A little goes a long way, it doesn't make my paper bubble. I have yet to find a downside to this glue. My tape runners are not getting used any more. Art Glitter Glue (there's not glitter in it).
Wednesday, May 20, 2020
Card Making is Mermazingly Fun
Most of my creative energy for the past few months has gone into making cards. I guess I'm ready to start sharing again. I'm in LOVE with The Stamps of Life. Stephanie Barnard makes the most functional and versatile stamps and dies. They are by far my favorite at present. I'm in their Die Hard AND Card Kit subscription clubs and that makes me a GOLD member so I get a great discount. You can get more info on their website.
Heres a birthday card I made for my step-mother. On the front panel I used Little Coral Girl stamp set & coordinating dies from Picket Fence Studios. The patterned papers are from a Hobby Lobby aquatic themed paper pad.
I created this card at the cabin where I have more limited supplies so all coloring was done with Tim Holtz distress markers & inks with a water brush.

The Card body design dies are from The Stamps of Life Stephanie Barnard with Sizzix Card With Banners 3-D drop-in (and Birthday) and Lovely Sentiments (the card base). Happy is from The Stamps of Life Happy Sentiment Set.
The inside mermaids and sentiment are from Mama Elephant Mermaid Kisses.

Here's a video that shows how the card moves.
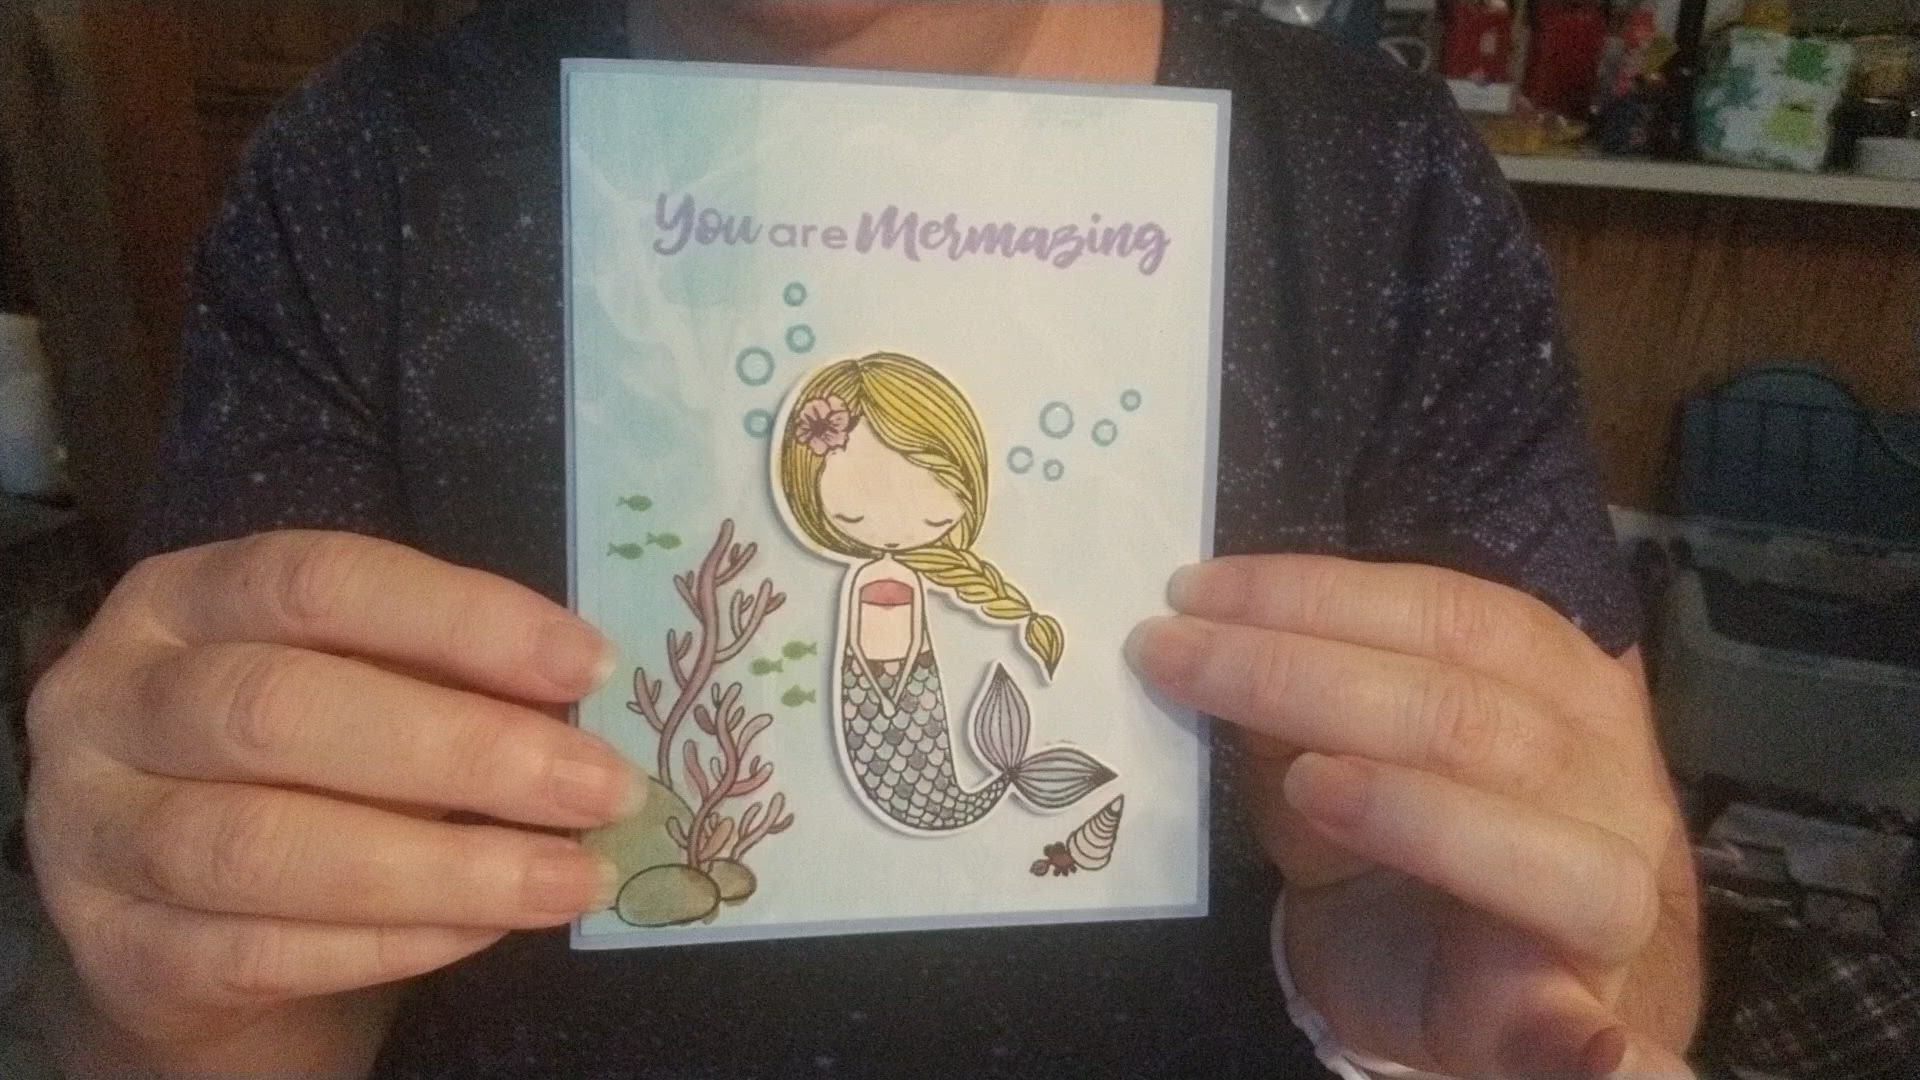
Heres a birthday card I made for my step-mother. On the front panel I used Little Coral Girl stamp set & coordinating dies from Picket Fence Studios. The patterned papers are from a Hobby Lobby aquatic themed paper pad.
I created this card at the cabin where I have more limited supplies so all coloring was done with Tim Holtz distress markers & inks with a water brush.
The Card body design dies are from The Stamps of Life Stephanie Barnard with Sizzix Card With Banners 3-D drop-in (and Birthday) and Lovely Sentiments (the card base). Happy is from The Stamps of Life Happy Sentiment Set.
The inside mermaids and sentiment are from Mama Elephant Mermaid Kisses.
Here's a video that shows how the card moves.
Sunday, January 10, 2010
Cuttlebug Machine with Spellbinders Dies
I recently gifted a Cuttlebug machine to my friend Heather. I've been wanting to get her one for a long time, so this year I combined her Birthday (July) with Christmas and sent her a machine. She's expecting & there are so many cute dies and embossing folders to use for baby stuff, I wanted her to have it in time to use with any baby cards, scrapbook pages and etc... that she might be making in her brand-new-mommy days. Oh how I wish I was in California to make over her in her waiting days... so instead I sent her a Cuttlebug.
Telling Heater - via some lengthy emails - everything that her Cuttlebug can do has got me excited about mine again... So I decided to have another go at using Spellbinders Nesting & Embossing Dies in my Cuttlebug machine. This morning I happened across a great YouTube video tutorial of how to do it. It involves layering the cutting & embossing plates in a special order, so I needed a refresher.
Wednesday, December 9, 2009
Cricut Creations
There has been a lot of interest lately in Cricut machines, so I'm posting Cricut artwork that hasn't previously been on my blog. Most of these are things I posted to the Cricut Message Board before I had my own blog. I'll give a link to project details on that board when possible.
Click Artwork for Larger view
Harvest Layouts http://www.cricut.com/messageboard/tm.aspx?m=408620


Thanksgiving pages. Made with CTMH True Fit Folios.


Thanks a Latte card - (cuttlebug swirl texture) http://www.cricut.com/messageboard/tm.aspx?m=962366&mpage=1&key=󪼾
Click Artwork for Larger view
Harvest Layouts http://www.cricut.com/messageboard/tm.aspx?m=408620


Thanksgiving pages. Made with CTMH True Fit Folios.
Valentine Pillow Box http://www.cricut.com/messageboard/tm.aspx?m=340541


Thanks a Latte card - (cuttlebug swirl texture) http://www.cricut.com/messageboard/tm.aspx?m=962366&mpage=1&key=󪼾


Saturday, December 6, 2008
Paper Pups Evensong Miss You Card
I haven't had my Cricut out in awhile, but playing with it the other night has got me creating again. (Click image for larger view)

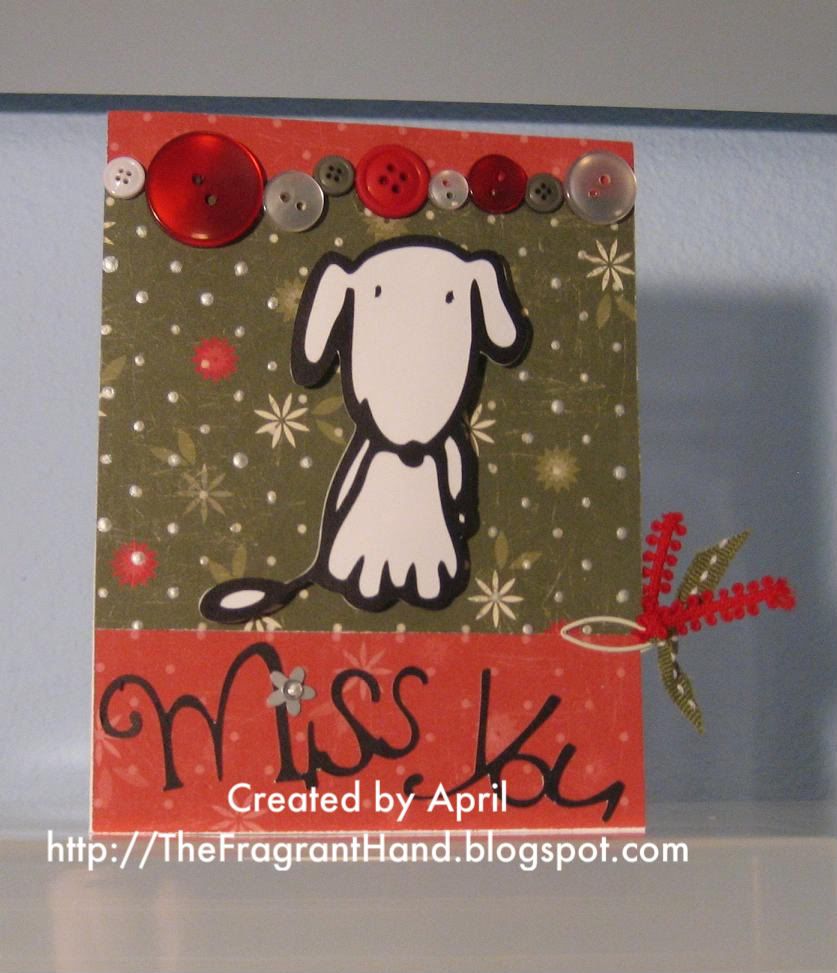
This card is made with papers from Close To My Heart's Evensong paper pack, the red patterned paper is the back of the green patterned paper, very nifty. The ribbons are from the Holiday Designer Ribbon Rounds tied onto a clip from the Holiday Mini-Medley Accents Collection. The "i" is dotted with a flower sequin (used to be in the White My Accents Collection), with a sparkle on top. I used the back end of a paint brush and Create-a-Shade Pearl Paint to put dots of pearl over the dots on the green paper and in the center of the sparkle. Buttons are attached with liquid glass and are from the Holiday Craft Buttons Collection. I used 3d foam squares under the dog image to add some dimension to the card.
All supplies are Close To My Heart
The dog and "Miss You" are cut using a Cricut Machine, images are from the Paper Pups cartridge, I was inspired by the Quick Start project in the product handbook.
Cuts are:
LeashDog - Cut at 3" out of Black Cardstock (this is the outline)
LeashDog - Cut at 3" with Blackout Feature from White Daisy CardstockMiss You (Shift of leashDog) Cut at 1 1/4" out of Black Cardstock
I used the CTMH Glue Pen to assemble the pieces and adhere the letters, I also sometimes use the Write N Rub pen - it's like a ball point adhesive pen and works wonderfully for very small pieces.
Rather than try to adhere the tiny bits of cardstock for the eyes, I just used the scrap piece that was cut from the center of the outline as a stencil, I placed it back into the outline and used my black marker to color in the holes for the eyes onto the white cardstock.
Friday, November 21, 2008
Present Tie-On Idea: Scooby Doo
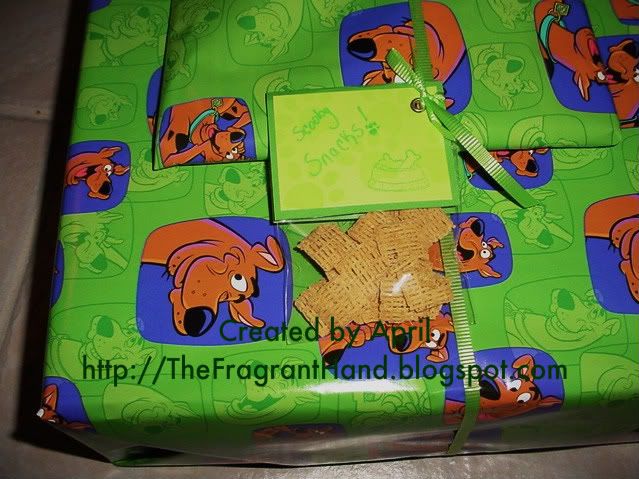
Welcome to the final day of this week's Classic Artwork Blitz! Scooby Doo has been a popular gift wrapping theme in our house for some time. The colors are bright and fun and they work equally well for a boy or a girl. Here hand made accents add charm to store-bought wrapping paper.

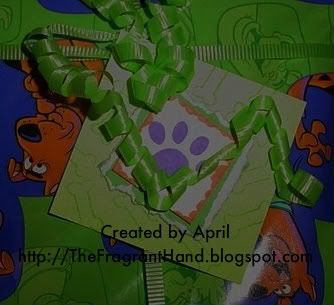
I made a 3x3 gift card and attached it to the gift. I also made a small treat bag filled with "Scooby Snacks" (AKA chex cereal) which I tied onto the ribbon on the package. The "Scooby Snacks" bag topper has green paw prints stamped all over it which didn't show up in the photo. I carried out the theme by selecting colors which coordinated with my wrapping paper and stamps from CTMH's (now retired) Best Friend Doggy stamp set. The green-on-green tag and bag topper were modeled after the green-on-green Scooby portraits in the wrapping paper.
Let me know if you have enjoyed this week's Classic Art Blitz!
If you try this idea, please post a comment to this post and share the link to your artwork. I'd love to see what you make!
Stamps: Best Friend Doggy
Colors: Orange, Hydrangea, Clover Meadow, and Citrus Leaf
All supplies on Handmade items by Close To My Heart
Let me know if you have enjoyed this week's Classic Art Blitz!
If you try this idea, please post a comment to this post and share the link to your artwork. I'd love to see what you make!
Stamps: Best Friend Doggy
Colors: Orange, Hydrangea, Clover Meadow, and Citrus Leaf
All supplies on Handmade items by Close To My Heart
Wednesday, November 19, 2008
Frightening Fun - Quick Color Technique
As part of this weeks Classics Artwork Blitz, here are more Classic samples using the Quick Color Technique described in Monday's Post The Fragrant Hand: Quick Color Technique - Line Image and Tuesday's Post The Fragrant Hand: Quick Color Technique - Solid Image.

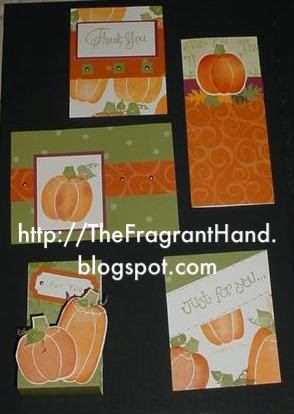
I added additional shading to the pumpkins with the quick color sponging technique by cutting out the segments of the pumpkins.
These samples are made with Frightening Fun (retired) but would work wonderfully for adding dimension to the new CTMH stamp set Spooky Smiles just cut segments into your stencil and sponge in a deeper shade or gold or orange.
Check back tomorrow (10 AM Central Time) for a quick tip for use with any solid pumpkin stamp set.
If you try this, please post a comment to this post and share the link to your artwork. I'd love to see what you make using this technique!
All supplies by Close To My Heart
Stamps: Frightening Fun, Curly Greetings
Color Used: Sunflower, Autumn Terracotta, Olive
Ticket Template (retired)
I added additional shading to the pumpkins with the quick color sponging technique by cutting out the segments of the pumpkins.
These samples are made with Frightening Fun (retired) but would work wonderfully for adding dimension to the new CTMH stamp set Spooky Smiles just cut segments into your stencil and sponge in a deeper shade or gold or orange.
Check back tomorrow (10 AM Central Time) for a quick tip for use with any solid pumpkin stamp set.
If you try this, please post a comment to this post and share the link to your artwork. I'd love to see what you make using this technique!
All supplies by Close To My Heart
Stamps: Frightening Fun, Curly Greetings
Color Used: Sunflower, Autumn Terracotta, Olive
Ticket Template (retired)
Wednesday, October 29, 2008
Halloween Gift Card Reading is a TREAT Card
This is one of my favorite stamp sets, the kids remind me of the Lemony Snicket books for some reason (not the movie, just the books)
When I first made these cards, the concept was to promote reading. So they have a bookmark in the pocket in front and a spot for a gift card for Barnes and Noble or other bookstore in the pocket on the inside. The greeting I came up with for inside was,

This card is 8"x3.5" made to fit inside a standard legal envelope.
The base is made out of Olive cardstock it is 7"x8". If you want to print a sentiment on the inside now is the time to do it, before you begin to assemble the card. Random stamp bats in black over the right half of the card, then fold it half to make the card. Next cut a strip of black cardstock which you will use to form the pockets 6.5"x 3.5. Score the strip in the middle at 3.25." Stamp Happy Halloween with White Daisy ink. Now attach the scored strip to the card using white eyelets. This will give you a pocket both inside and out. The fold is at the bottom (rather than the side) so things can't drop out the bottom of the pocket.

Inside Pocket and Bookmark
The bookmark is 7"x2.5" and the base is Pansy Purple. Cut a piece of Goldrush 6.75"x2.25" and layer them together. Stamp your images on a strip of cardstock that is 1.75" in width and cut to the right height for your images. Now mat on black cardstock that is .25" wider and .25 taller than your white piece. I colored the images using a waterbrush and re-inkers. I used a marker in Vanilla Cream to color the skin-tones. Add the squares to the bookmark and finish with Three Black eyelets across the top of the card. I put my bookmark into a protective vinyl bookmark sleeve purchased from http://clearbags.com/ I trimmed off the triangle top so the sleeve was the same height as my bookmark.
All Supplies by Close To My Heart
Stamp Set: Halloween Dingbats (retired)
Colors: Olive, Archival Black, Pansy Purple, Goldrush, White Daisy, Vanilla Cream, Desert Sand
Waterbrush, Eyelets, Re-inkers, Vinyl Bookmark Sleeve
When I first made these cards, the concept was to promote reading. So they have a bookmark in the pocket in front and a spot for a gift card for Barnes and Noble or other bookstore in the pocket on the inside. The greeting I came up with for inside was,
"It's no TRICKclick photos for larger view.
Reading is a TREAT!
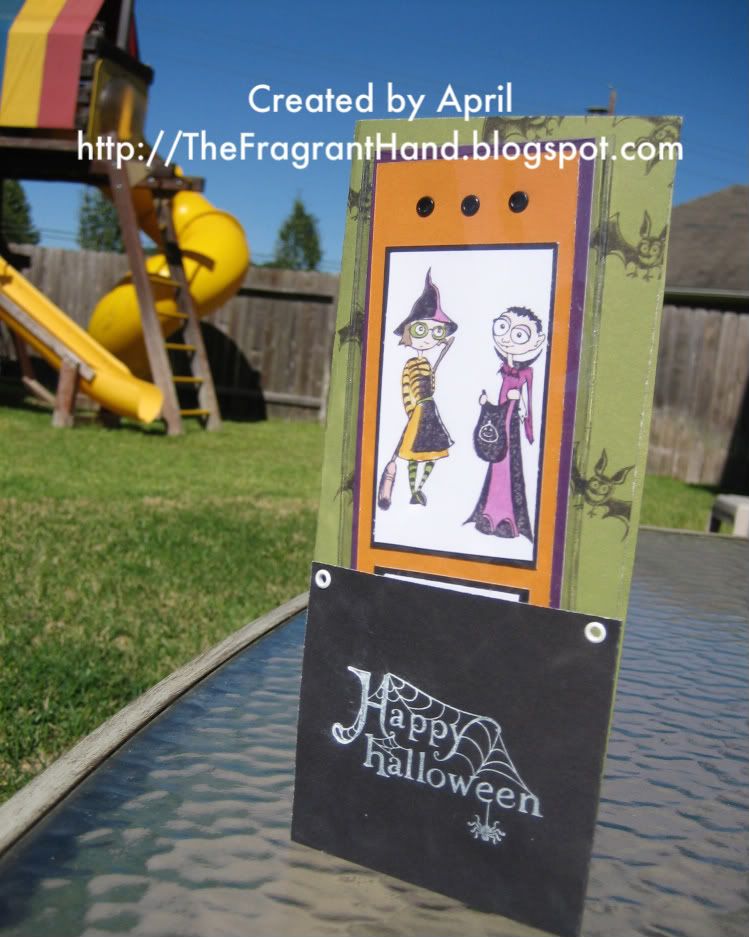
This card is 8"x3.5" made to fit inside a standard legal envelope.
The base is made out of Olive cardstock it is 7"x8". If you want to print a sentiment on the inside now is the time to do it, before you begin to assemble the card. Random stamp bats in black over the right half of the card, then fold it half to make the card. Next cut a strip of black cardstock which you will use to form the pockets 6.5"x 3.5. Score the strip in the middle at 3.25." Stamp Happy Halloween with White Daisy ink. Now attach the scored strip to the card using white eyelets. This will give you a pocket both inside and out. The fold is at the bottom (rather than the side) so things can't drop out the bottom of the pocket.
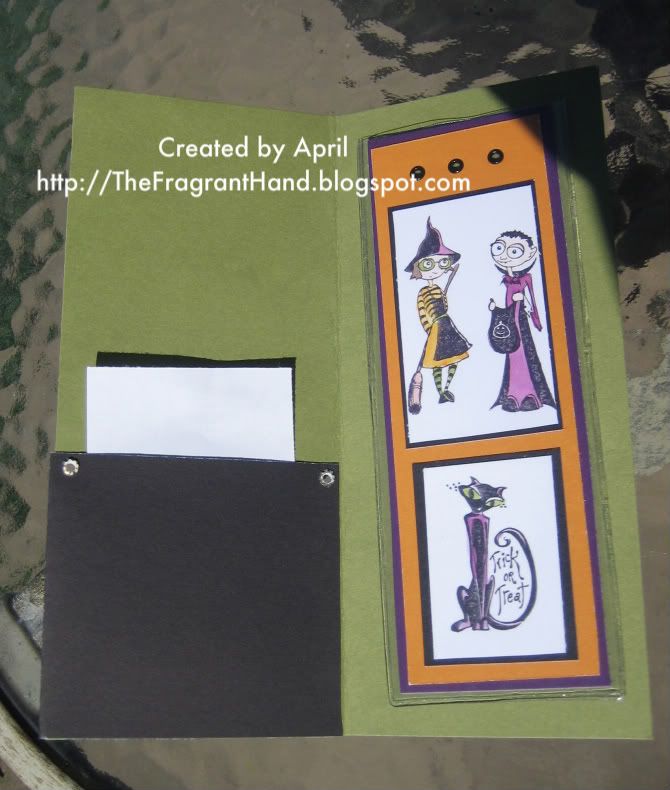
Inside Pocket and Bookmark
The bookmark is 7"x2.5" and the base is Pansy Purple. Cut a piece of Goldrush 6.75"x2.25" and layer them together. Stamp your images on a strip of cardstock that is 1.75" in width and cut to the right height for your images. Now mat on black cardstock that is .25" wider and .25 taller than your white piece. I colored the images using a waterbrush and re-inkers. I used a marker in Vanilla Cream to color the skin-tones. Add the squares to the bookmark and finish with Three Black eyelets across the top of the card. I put my bookmark into a protective vinyl bookmark sleeve purchased from http://clearbags.com/ I trimmed off the triangle top so the sleeve was the same height as my bookmark.
All Supplies by Close To My Heart
Stamp Set: Halloween Dingbats (retired)
Colors: Olive, Archival Black, Pansy Purple, Goldrush, White Daisy, Vanilla Cream, Desert Sand
Waterbrush, Eyelets, Re-inkers, Vinyl Bookmark Sleeve
Friday, October 17, 2008
Goodness of Life, Baroque Alphabet Thanks Card
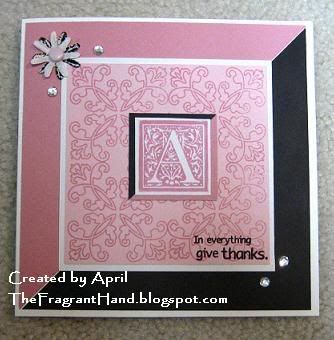
I love the Baroque Alphabet it is so easy to make something quick with a monogram.
This card gives the impression of 3 dimensional frames because of the mitred looking corners.
I cut 2 squares of Cardstock one Hollyhock and one black, then cut each one in half diagonally using my paper trimmer. I did the same with smaller squares to frame the Monogram. The card is 6"x6" size.
Stamps: Baroque Alphabet, Goodness of Life
Cardstock Colors: Black, Hollyhock, Blush, White -- Ink Colors: Hollyhock & Black
Monday, October 13, 2008
Uptown Girls Card
This is one of my all time favorite stamp sets and how can you go wrong with black and pink.

I like to stamp with Archival Black Ink, it's just deeper and richer than regular black and once its dry it won't run when you color. The image is colored with markers. Girly Girl is stamped on vellum in Archival Black Ink.
All supplies by Close To My Heart
Stamps: Uptown Girls, Girly Girl
Colors: Archival Black, Baby Pink, Desert Sand
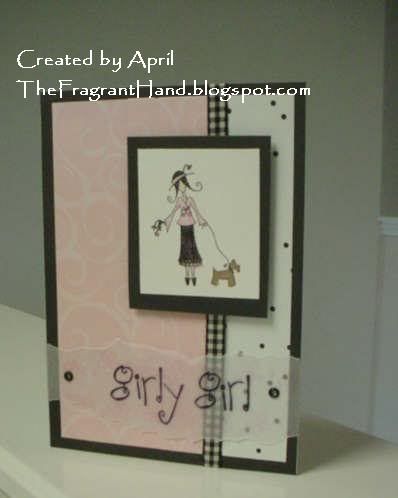
I like to stamp with Archival Black Ink, it's just deeper and richer than regular black and once its dry it won't run when you color. The image is colored with markers. Girly Girl is stamped on vellum in Archival Black Ink.
All supplies by Close To My Heart
Stamps: Uptown Girls, Girly Girl
Colors: Archival Black, Baby Pink, Desert Sand
Saturday, October 4, 2008
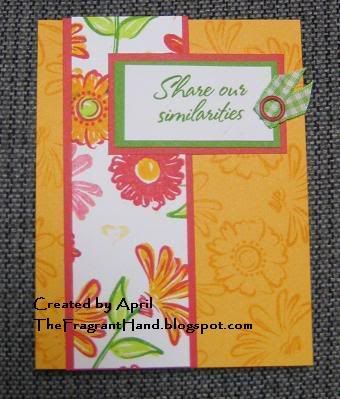
Simple Blossoms Card
Happy World Card Making Day!

Sunflower Card Base Random Stamped with Outline Images in Sunflower Ink
White Strip of Cardstock Random Stamped with Solid Stamps, then overstamped with darker or contrasting ink with outline stamps.
Red flowers stamped by inking Solid Stamp in Holiday Red ink then stamping off ink on scratch paper then stamping on project. This gives a lighter intensity of the same color and is called 2nd Generation Stamping. Then ink the outline stamp in holiday red ink and stamp as usual.
All supplies by Close To My Heart
Stamps: Simple Blossoms
Colors: Citrus Leaf, Clover Meadow, Sunflower, Holiday Red
Sunflower Card Base Random Stamped with Outline Images in Sunflower Ink
White Strip of Cardstock Random Stamped with Solid Stamps, then overstamped with darker or contrasting ink with outline stamps.
Red flowers stamped by inking Solid Stamp in Holiday Red ink then stamping off ink on scratch paper then stamping on project. This gives a lighter intensity of the same color and is called 2nd Generation Stamping. Then ink the outline stamp in holiday red ink and stamp as usual.
All supplies by Close To My Heart
Stamps: Simple Blossoms
Colors: Citrus Leaf, Clover Meadow, Sunflower, Holiday Red
Thursday, September 25, 2008
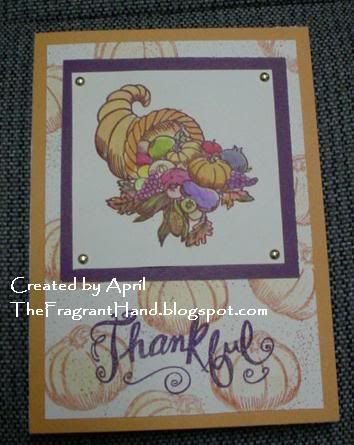
Give Thanks Thanksgiving Card
Click Photo For Larger View

All Supplies by CTMH
Stamps: Give Thanks, Stoneware Texture
Ink and Cardstock Colors: Pansy Purple, Autumn Terracotta, Goldrush
Colored Using Waterbursh with ink pads and watercolor pencils
All Supplies by CTMH
Stamps: Give Thanks, Stoneware Texture
Ink and Cardstock Colors: Pansy Purple, Autumn Terracotta, Goldrush
Colored Using Waterbursh with ink pads and watercolor pencils
Thursday, September 18, 2008
It's A Party Card

Click photo for lager view
All supplies by Close To My Heart
Stamps: It's A Party!
Colors: Kiwi, Breeze, Archival Black
Wednesday, September 10, 2008
Treasure Life Silhouette Cards
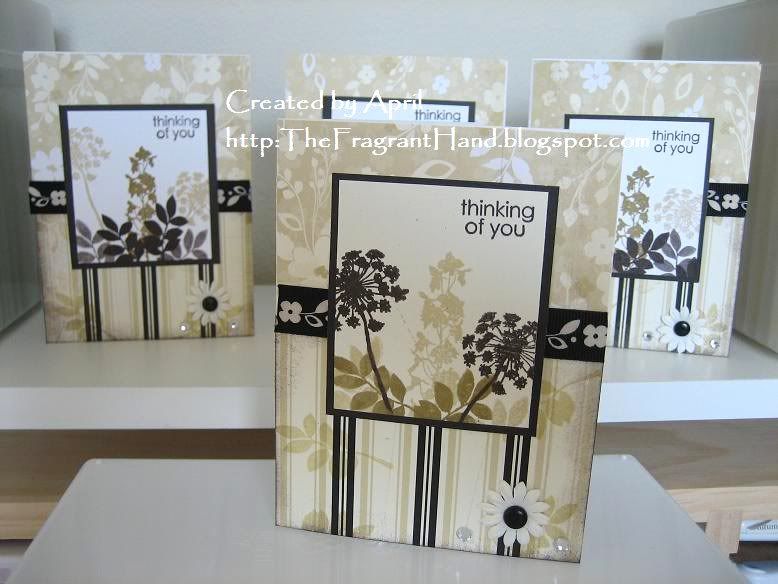
Click for larger view
All supplies by Close To My Heart
Stamp Sets: Treasure Life, Say It In Style
Colors: Black, Bamboo, Desert Sand
Silhouette Paper Packet
On the striped paper I random stamped leaves in Bamboo Ink and sponged the edges with black ink. Ribbon is from the Black Ribbon Round. I also used a black bigger brad, paper flower and sparkles.
Wednesday, September 3, 2008
Take Flight Owl Halloween Card
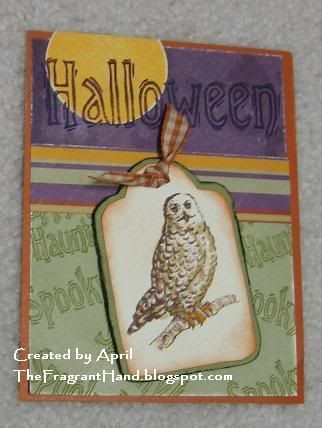
I love this card. My favorite thing about it is the moon, how the layers overlap and how it is cut off at the top.
I did make this card last year so it was hard to remember what I did, but I had a lot of questions about how I got the owl to look like this. So I went back into my stamp room with the card and fiddled on my desk pad to figure out precicely which colors I had used on the owl. I stamped the owl on Colonial White Cardstock - that is part of why he looks richer, it's not stamped on stark white. I stamped him in Chocolate Ink - (also a richer, warmer look than black ink.) Then I scribbled his feathers here and there to kind of shade him up a bit with a Bamboo Marker. Originally I was trying to make him (her?) look like Hedwig but I found the browns worked better for getting a good look on the owl with these papers so I let go of that concept. I colored his eyes with a Garden Green Marker. His feet and beak are Autumn Terracotta Marker. The branch was chalked I sponged the edges of the tag with Terracotta Ink, this helped the tag look less flat and disguised the fact that most of the owls body was the same color as the tag.
All Supplies by Close To My Heart
Stamps: Take Flight, Frightening Fun, Tag Stamp
Enchanted Paper Pack
Colors: Colonial White, Autumn Terracotta, Sunflower, Pansy Purple, Olive, Garden Green, Bamboo
Subscribe to:
Posts (Atom)


 Posts
Posts


