Pages

Showing posts with label Breakfast. Show all posts

Friday, November 8, 2013

Make-Ahead Migas Breakfast Casserole

Now that Ethan is in high school the bus picks him up before the sun. In the interest of smoother running mornings I've been trying to utilize a lot of breakfast casseroles that can be baked Sunday night & re-heated throughout the week.

I wanted to come up with a casserole take on our favorite variety of migas inspired scrambled eggs. I knew I would need to solve the dry eggs issue in a casserole that was intended to be reheated in the microwave each morning. I remembered that my Aunt Virginia (a caterer) once told me the key to keeping eggs from drying out on a buffet was cream cheese. I've now made this casserole twice & it seems to be the current favorite.

Please be advised if you use a lower fat milk you may have issues with the casserole getting watery on you. The half & half is there in order to create an emulsion. For an explanation of why achieving emulsion is important in egg dishes please see Perfect Scrambled Eggs Made Easy.

For serving I cut a square, re-heat it in the microwave, then top it with taco sauce & sour cream.
2013-11-07 21.58.00
Make Ahead Migas Breakfast Casserole

Chunky Filling Items
10 corn tortillas cut into pieces & fried
Ham I like to use a lot
1 onion, chopped fine
1 green bell pepper, chopped fine
1 can ortega chilis
2 cups of shredded cheese, I like cheddar, jack or a combination of the two

Egg Mixture
1 8 oz package cream cheese softened
8 eggs added 1 at a time
1/2 teaspoon salt
2 cups half & half or whipping cream
2 green onions (optional)
a handful of fresh cilantro (optional)

Remove cream cheese from refrigerator so that it can begin to soften.

Cut 10 corn tortillas into strips. Fry the strips in batches, in oil for about 2 minutes flipping them over half way through (they'll fry best if you wait to fry until your oil is between 350 and 375 degrees fahrenheit.) Drain fried tortilla strips on paper towels. To skip this step you could substitute tortilla chips but they will be much saltier, and I suspect greasier and containing more preservatives. Or you could use un-fried tortillas, but they will soften & disintegrate in the casserole giving a very different texture.
2013-11-07 19.11.552013-11-07 19.44.32
For breakfast ham I have used several different types depending on what was available at my market at the time. Sometimes I can find small sliced boneless hams that have been shrink wrapped, these are very easy to work with. Last night I had a ready-to-eat picnic ham, it was difficult to work with because of the fat cap & trimming around the bone. I wouldn't go that route again. Sometimes ham steaks are available in my meat department they are also quite easy to work with. Failing the above I get ham from the service deli. I have them slice it on the thickest setting & I get 2-3 slices depending on the size of the ham. The ham from the deli is the easiest option, but depending on the season other hams may be a better price. 

Place ham slices in a large skillet and heat them up, allowing them to brown a little bit on each side. Browning the ham seems to activate the flavors of the ham. Try an experiment & eat a piece of ham before browning, then eat a piece that has been browned. HUGE flavor difference! 
Remove the ham to a cutting board, stack & cut into bite-size pieces.

2013-11-07 20.02.432013-11-07 20.09.39
Add a bit of olive oil or butter to the skillet you used for the ham & saute the onion & bell pepper until soft. I like to use a bamboo paddle or wooden spoon and scrape up the brown left in the bottom of the pan from the ham. Ham flavored veggies is a good thing. When the veggies are soft, mix in 1 small can of mild Ortega chiles. I didn't add chiles to my 1st casserole & I felt it really needed this specific flavor.
2013-11-07 19.56.572013-11-07 20.11.58
Spray a 9x13 baking dish with non-stick spray. You can mix all the chunky filling ingredients with the cheese in a bowl & dump into the casserole dish. Or save yourself the washing of a bowl & add each ingredient to the casserole dish as you prep them, then take a pair of tongs & mix them right in the casserole dish.
2013-11-07 20.13.042013-11-07 20.22.45
Now for the egg mixture. You need to incorporate the cream cheese throughout the eggs, you want to form an emulsion, mix them evenly, not chunks or bits. There are 2 ways to accomplish this.
1) Cream the cheese in a mixer & when it is soft add the eggs 1 at a time mixing until creamed into the cheese (1st photo is after all eggs are added), then add salt, and slowly pour in the half & half or cream while the mixer is running.
OR
2013-11-07 20.18.332013-11-07 20.20.522013-11-07 20.18.28
2) If you have a really good blender like a Blendtec or a Vitamix, you can mix up everything in your blender.
I have made this casserole both ways & both work.
Because I DO have a blendtec blender and I know it will blend evenly I also add 2 green onions cut in half to the blender jar. They gave great flavor. Last night I used the creaming mixture method but I wanted to incorporate some leftover cilantro I had in the fridge so I blended my half & half with the cilantro before adding it to the egg mixture. The cilantro was very subtle but if you have some handy, go ahead & add it.
2013-11-07 20.23.062013-11-07 20.23.22
Pour the egg mixture over the chunky filling ingredients in the casserole dish. I take a pair of tongs & lift up bits of the filling from the bottom in order to allow the egg mixture to flow in and around the ingredients so that I don't end up with chunky stuff on the bottom & eggs on the top.
2013-11-07 20.23.53-1
You could top the casserole with additional 1/2 cup of cheese if desired I don't find it necessary.

Cover with foil Bake in a preheated 350 degrees Fahrenheit oven for 1hour 10 min. Remove foil & continue baking for 10 more minutes.

If serving hot allow to cool for 10 minutes before cutting & serving. Or allow to cool, cover with foil & store in the refrigerator for future use.
2013-11-07 21.58.44

Friday, May 18, 2012

Quick Weekday Migas

This is the new favored breakfast dish for school mornings in our house. Boy and Mama are equally enthusiastic so I thought I'd share it with you.
IMG_0806.JPG

2 eggs
salt
cream or half & half
tortilla chips
taco sauce
shredded cheese
butter or olive oil
ham (optional)

Beat the two eggs in a bowl with a dash of salt then add the cream or half and half (if you use milk you will get watery eggs - see my post on Perfect Scrambled Eggs for why.) Don't skip the salt, it goes a long way to eliminating that sulfer egg taste.
IMG_0795b.JPGIMG_0797.JPG

Crumble in a handful or two of tortilla chips, a squirt of taco sauce, and a pinch of finely shredded cheese. (A small amount of shredded cheese mixed into the eggs while cooking will melt and flavor throughout instead of just sitting on the top getting rubbery - it's a good way to get the flavor with fewer calories & fat.)  If I have the time I like to go make coffee at this point to let the tortillas soften up a bit in the egg mixture, some mornings I don't have the extra time, they still taste good if you don't.
IMG_0800.JPGIMG_0801.JPG

Add diced ham to and 8 or 7 inch omelet pan, if you are using it. I buy a large ham at the market & use it for breakfasts over the next 2 weeks or so. If I plan to make it into eggs I dice up a few ham steaks and keep the dice in a zip-loc bag ready for using with eggs.  If you saute the ham in the pan a bit it will bring out more flavor.  When the ham is hot, add 1 tablespoon of butter to the pan.  Make sure you have a puddle of butter (or oil) that covers the bottom of the pan & pour the eggs into it.
IMG_0802.JPG

When the edges of the eggs are just set, take a heat safe silicon spatula and pull 3 edges toward the center (See Scrambled Egg Post).  When edges are set again, repeat.  Now turn up the heat in the pan, when the full underside of the eggs looks puffed, turn the eggs. It will break into pieces, just turn each piece, if you wait until you can turn all the eggs in one piece your eggs will get dry.
IMG_0805.JPG

The eggs will be done nearly as soon as you flip them, turn them out onto a plate, if you leave them in the pan, they will overcook.

Serve, you can add your choice of condiments, some ideas include: taco sauce, salsa, sour cream, avocado slices, guacamole - you get the idea.


Monday, June 22, 2009

Perfect Scrambled Eggs Made Easy - Finally, Eggs Explained

I've included lots of photos so you can see what the eggs look like when ready for each step, click photos for a larger view.

Today I'm going to share one of my basics. These are not special occasion eggs, like my Dad's Green Eggs & Ham (which I'll try to get him to share when I am in California next month.) These are the everyday eggs I make for Ethan in summer, on weekends and the occasionally more-together school morning. They are quick, they are easy but there are several tricks to getting them to come out the way they do. Once you know, you can do it. These are Ethan's favorite eggs (well, after those Green Eggs & Ham that Papa makes.) Robert was a cook in the Army so he ROCKS breakfast in short order - he is the breakfast king in our house, but Ethan prefers my scrambled eggs, he will poke questioningly at Robert's cheese laden eggs, sniff them and announce "These aren't Mama's eggs!"

I'm not making an omelet here, don't really like omelets much to tell you the truth. And since I'm being truthful I might as well admit that I won't eat anyone else's scrambled eggs. There is a sulphuric taste to plain scrambled eggs that I can't stand, but I've figured out a way to get rid of it. These aren't made to be pretty, remember it's not an omelet, they're scrambled eggs, they're made for taste.

Mama's Eggs or Perfect Scrambled Eggs

Ingredients listed are for one serving (or 2 if you're making a lot of sides to go with it)

butter or olive oil (for the pan)
2 eggs
salt
half and half (non-negotiable I'll explain in recipe)
pre-shredded cheese, I use cheddar
thyme (fresh or dry) or whatever herb you like. Sometimes I use a touch of red taco sauce, instead

These come out best if you make them one serving at a time. You CAN make up to 3 servings all together in a 10-inch omelet pan, but I recommend beginning with a single serving - its easier to learn to recognize when you're ready for the next step when working with a smaller pan.

Equipment is Important
Use a non-stick pan, that is still non-stick. If your pans are old and stick, get a new one, or just buy a cheap 7 or 8 inch T-fall pan that you can use just for eggs. They're only a few bucks at Target - trust me, you don't want to do this with a sticky pan! I have very good pans, but I make eggs in T-fall there is no shame in it!
I use a flexible spatula that is heat safe (Mine's from Pampered Chef), a Rubbermaid spatula will melt. A flexible spatula works so much better than those flat pancake turners people usually use for eggs!

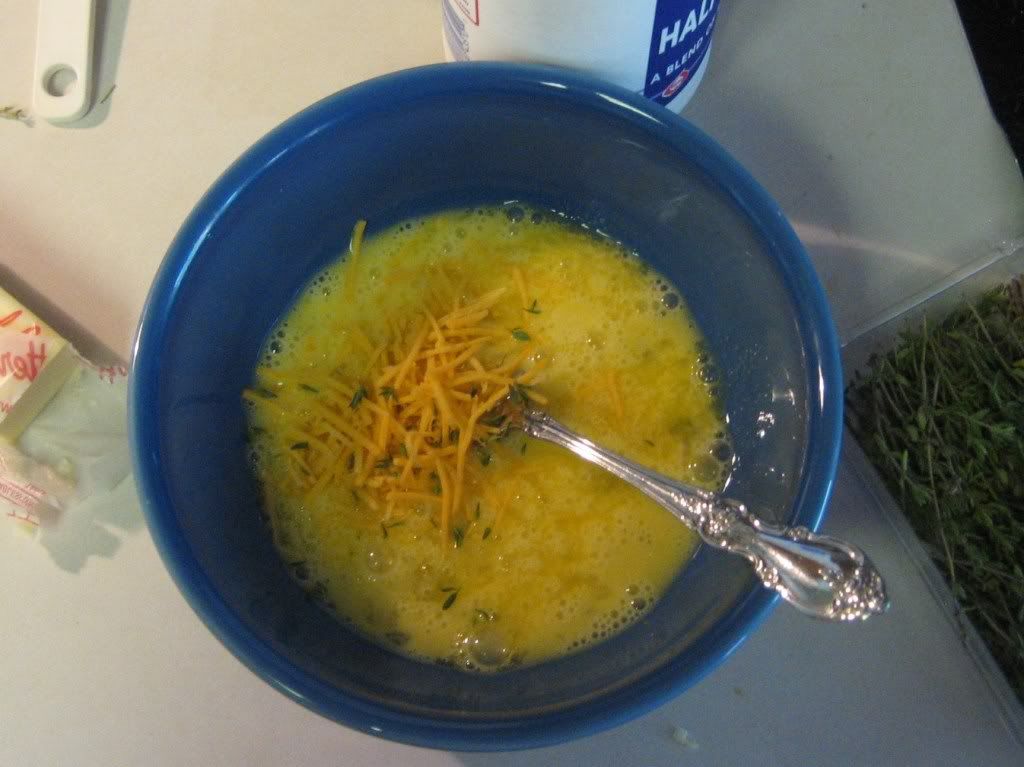
Use a bowl large enough to really be able to mix things up. Begin by beating the eggs with a fork until they are uniformly lemon yellow and you can no longer see any whites floating around on their own. This is IMPORTANT you are forming an emulsion - fancy science term for - mixing them so they won't separate on you later. I find the eggs blend better for me if I add one egg then beat, then add another egg, but you don't have to do it that way (I don't on schooldays.)

Add a pinch of salt. You always want to salt eggs before you cook them, then the salt will be throughout and you won't need as much. This is one of the things that helps to diminish that sulphuric taste I mentioned. Salting eggs after they are cooked makes them rubbery, you don't want that. Trust me and salt them.

Now you're ready to add a small glug of half-and-half. DO NOT USE MILK! Remember that emulsion I talked about... an emulsion is a balance of fat & water that binds together elements that normally don't mix. Milk doesn't have enough fat to hold the emulsion - if you use milk when your eggs reach a certain temperature during cooking the water in the milk will come OUT of emulsion and you'll have watery eggs. Have you even had water on a plate of scrambled eggs and wondered where it came from? That was from using milk. Half-and-half has the right amount of fat in it to stay in emulsion. (Sciency people if I'm making a hash of explaining this forgive me I learn all my food science from Good Eats & Cook's Illustrated - mainly I know that it works - I have never had watery eggs using half-and-half.)

Now you're ready for flavorings, I add a pinch of pre-shredded cheese, just a pinch, it gives flavor, disappears into the eggs & gets rid of the plain-egg taste. Don't use too much or it won't disappear into the eggs, you'll have cheesy gloppy eggs and you won't be able to tell the difference between eggs that are undercooked, and a pocket of melting cheese. You can stop there or add an herb. Ethan loves fresh thyme in his eggs - use whatever herb you like or have leftover from cooking dinner. If you use the taco sauce suggestion, just use a squirt, be careful not to add too much, taco sauce is watery (remember the emulsion) - you can put more taco sauce (or salsa & sour cream) on top when you serve the eggs if you want.

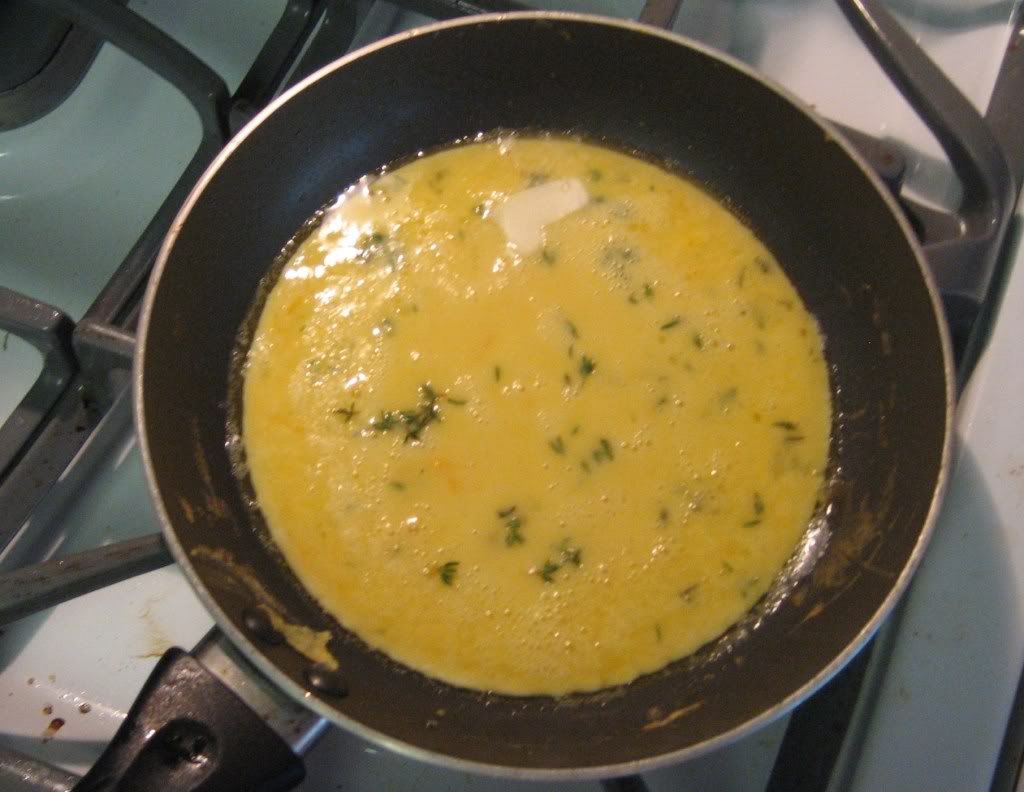
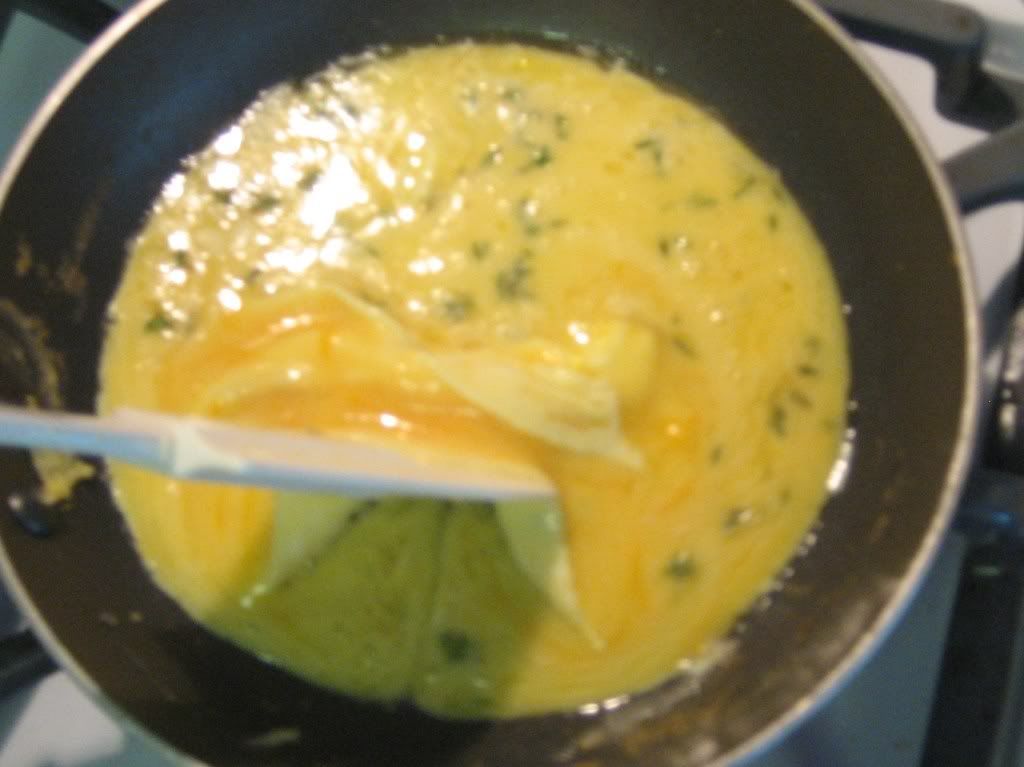
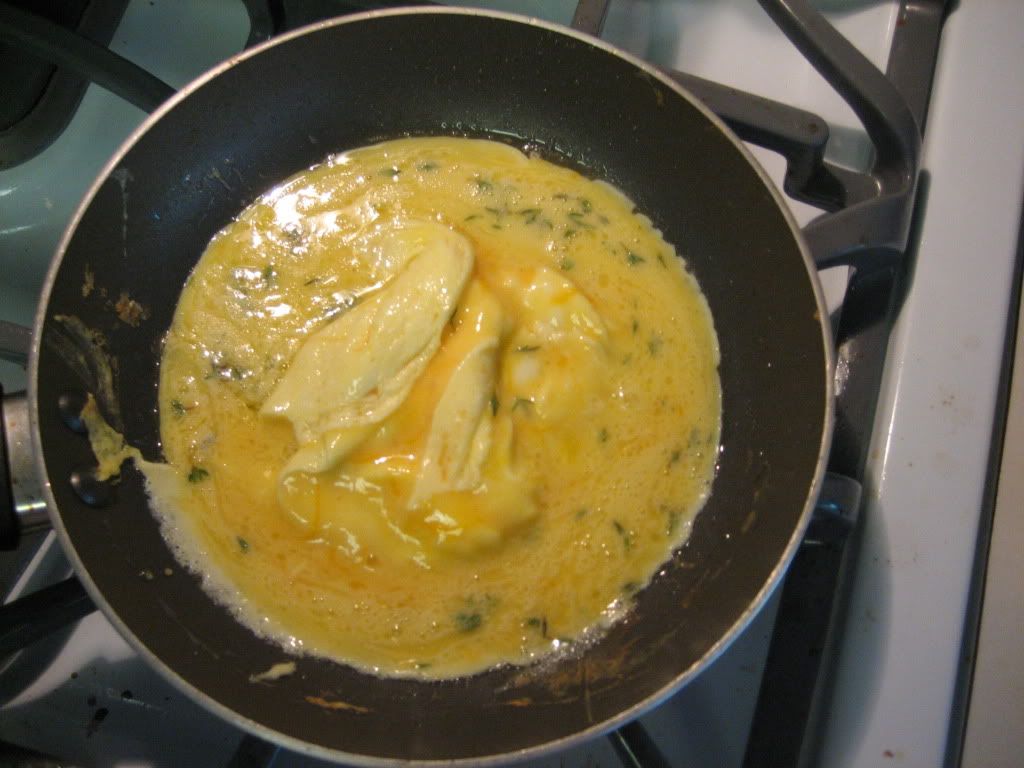
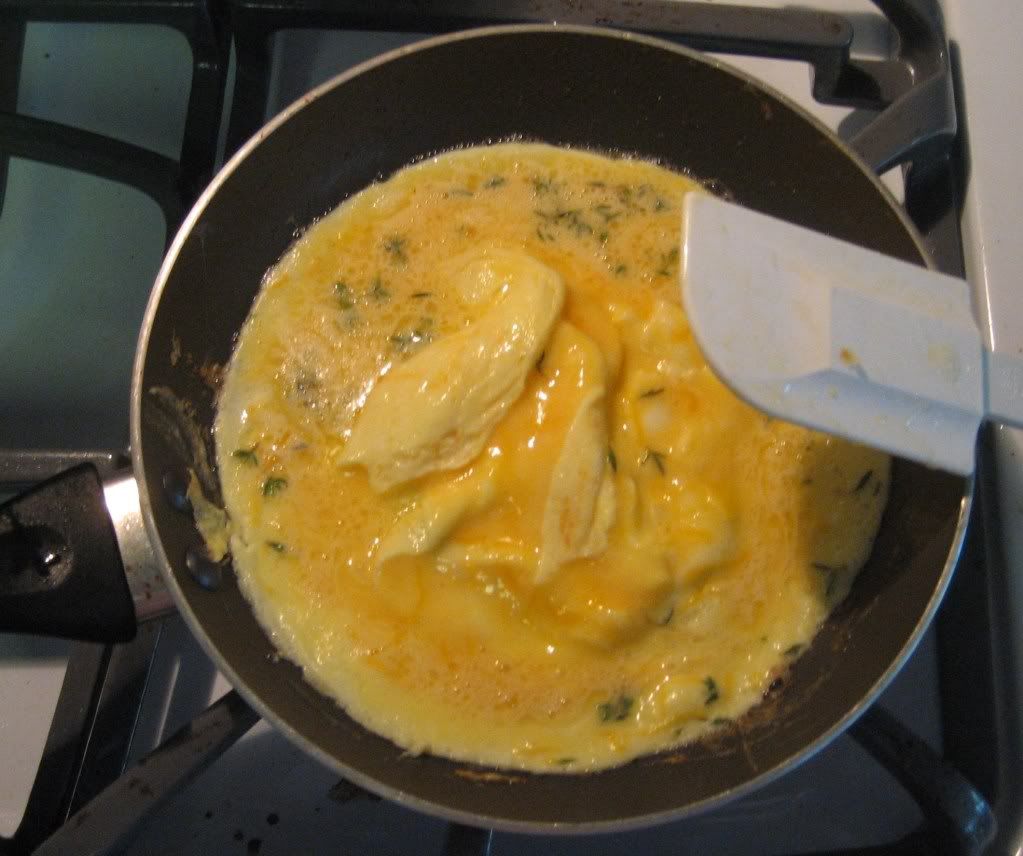
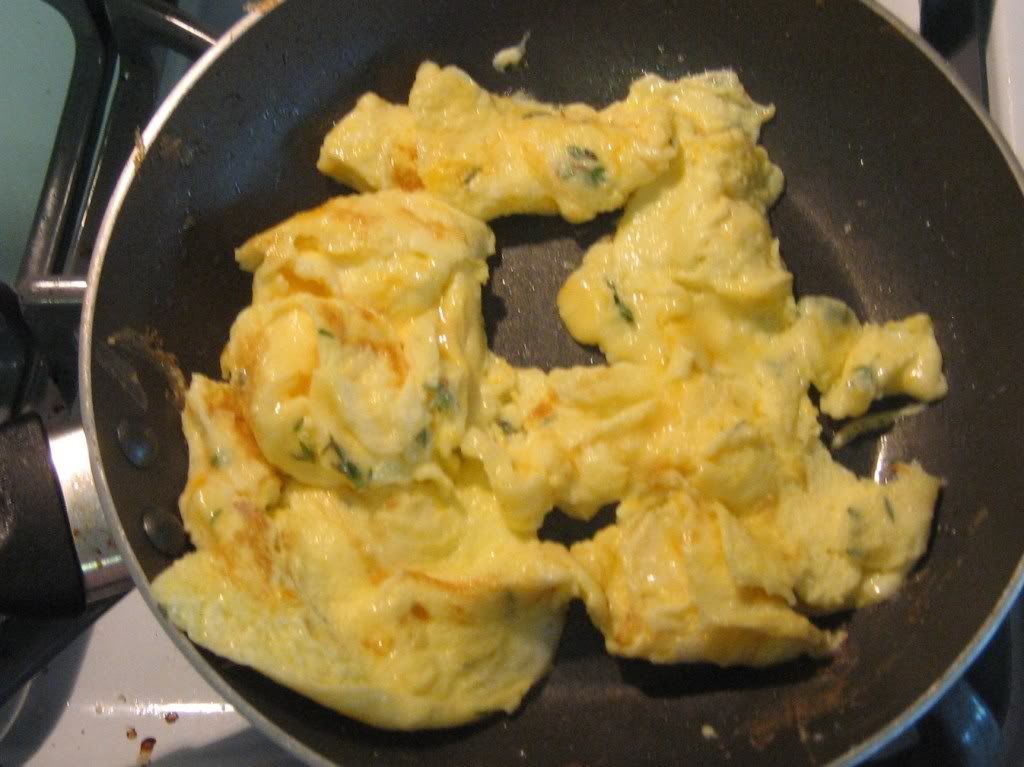
Time to cook. Heat your pan to medium low heat (I use gas you probably need to go lower on an electric stove,) put some olive oil, or butter in the pan. Butter is nice because I know the pan is hot enough when the butter is melted and covers the pan. Pour the eggs into the warm skillet and WATCH the edges. When you see that the edges are beginning to set (figure 1) take your heat safe spatula and pull them into the middle of the pan (figure 2). This forms what are called "curds" they are what makes scrambled eggs fluffy, moist & tasty. Omelets don't have them, that's why I don't like omelets! I have heard that Italians call them "rags" that's a better description of what you're looking for. When the edge are set again, pull the curds toward the center (figure 3) and turn up the heat to medium (if you don't turn up the heat it takes too long to finish the eggs and they can dry out.) When things look puffy (figure 4), flip the curds over to finish cooking on the other side. If you wait until you can flip the whole pan in once piece you'll overcook it. This is not an omelet, it's a scramble, embrace the tasty goodness of the curds, flip pieces as needed. Have your plate ready and turn the eggs out onto it as soon as they are done. Even off heat the difference between perfect & overcooked is a walk to the kitchen table - the eggs will continue to cook a tiny bit on the plate, so start thinking about getting them onto the plate when they are almost ready - by the the time you get them there, they'll be ready.
1 2 3
(1-edges set, ready to begin forming curds (2 -forming curds (3 after forming curds 2nd time
4 5
(4 ready to flip (5 done, time to eat!

Don't be daunted by how long this recipe is. These eggs are really easy, I've just taken the time & space to tell you how to do it, and explain what can go wrong & why so you can avoid it. I hope you'll try these eggs. It's a basic that doesn't get instructed very often. This is an amalgamation of things I have learned over a number of years from many sources. Scrambled eggs was the 2nd thing I learned to cook when I was a child (french toast was first, I asked to be taught so I could make it whenever I wanted it.) From Dad I learned that scrambled eggs should be moist, how they look when done, and not to overcook out of fear. I learned the thing about beating eggs & adding cheese before cooking by trial and error. I learned WHY beating the eggs worked (emulsion) from Alton Brown's show, Good Eats and I learned about salting & using half-and-half from America's Test Kitchen. So here are 30-some years of gathered info for you in one recipe. Now, eat your eggs!

Wednesday, October 15, 2008

Chocolate Chunk Bread Pudding

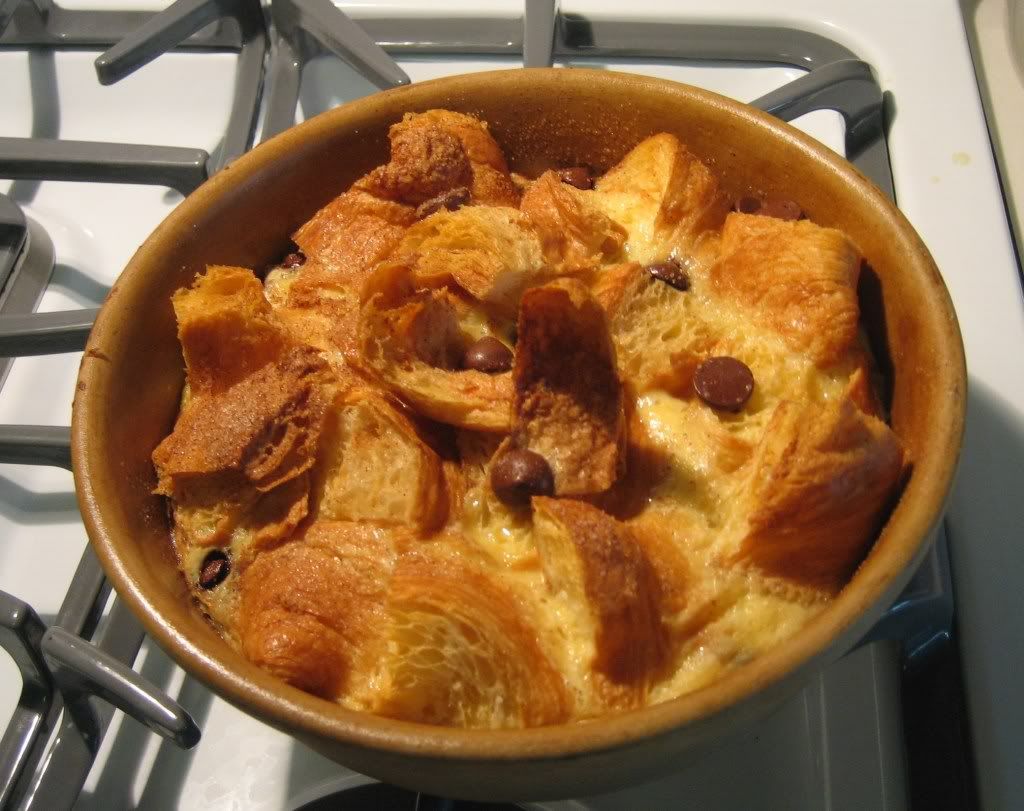
We've had two days of rain and tonight I was in the mood for something warm and comforting. This dessert is so delicious. I found it in a Pampered Chef Cookbook - Cooking for Two and More. Croissants form the base for this bread pudding, soaking up a delicious custard which is studded with chocolate gems. The top is sprinkled with sugar and becomes crisp like french Palmiers pastry. Be sure to use bittersweet chocolate, it makes a wonderful counterpoint to the sweet custard. I have made 3 changes to the original recipe...
First - I love the increased richness of the custard which comes from using whipping cream instead of the original half and half.
Second - I use Girardelli Bittersweet Chocolate Chips. I prefer the large gems of chocolate instead of the fine flake I got when coarsely chopping block chocolate.
And finally - I added cinnamon to the sugar that is sprinkled on top. Chocolate and cinnamon truly are a wonderful combination.
Enjoy this easy recipe which strikes a wonderful balance between creamy and crisp, bitter and sweet. It makes a lovely desert or a decadent breakfast with tea, coffee, or Mexican drinking chocolate.


2 eggs
2/3 cup whipping or heavy cream, unwhipped (or half and half)
1/4 cup sugar
1 teaspoon vanilla
2 medium croissants, cut int cubes
1 oz bittersweet chocolate chips (scant 1/4 cup)
1 tablespoon sugar
1/8 teaspoon cinnamon

1) Preheat oven to 325 F. Lightly spray mini baking dish with non-stick cooking spray (pie plate size or smaller.)
2) Whisk eggs one at a time, then whisk in Whipping Cream, vanilla and 1/4 cup sugar.
3) Place croissant cubes into baking dish; top sprinkled with chocolate chips. Slowly pour egg mixture over croissants; let stand 10 minutes.
4) Mix together remaining 1 tablespoon of sugar and cinnamon and sprinkle over top.
5) Bake 34-40 minutes or until top is deep golden brown and thermometer reads 160 degrees F. 6) Remove from oven and cool for 10 minutes before serving.

Friday, October 3, 2008

Oven Baked Pancake

Sorry no posts for awhile - I've been down, feeling lonely this week.

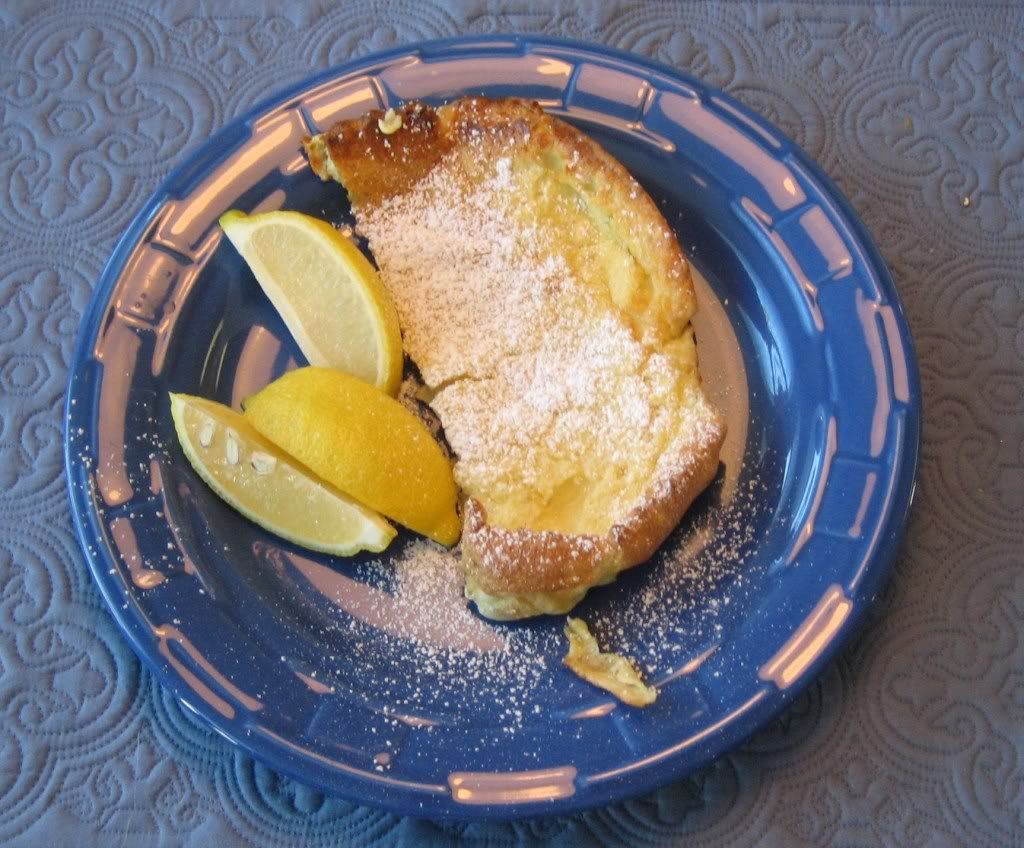
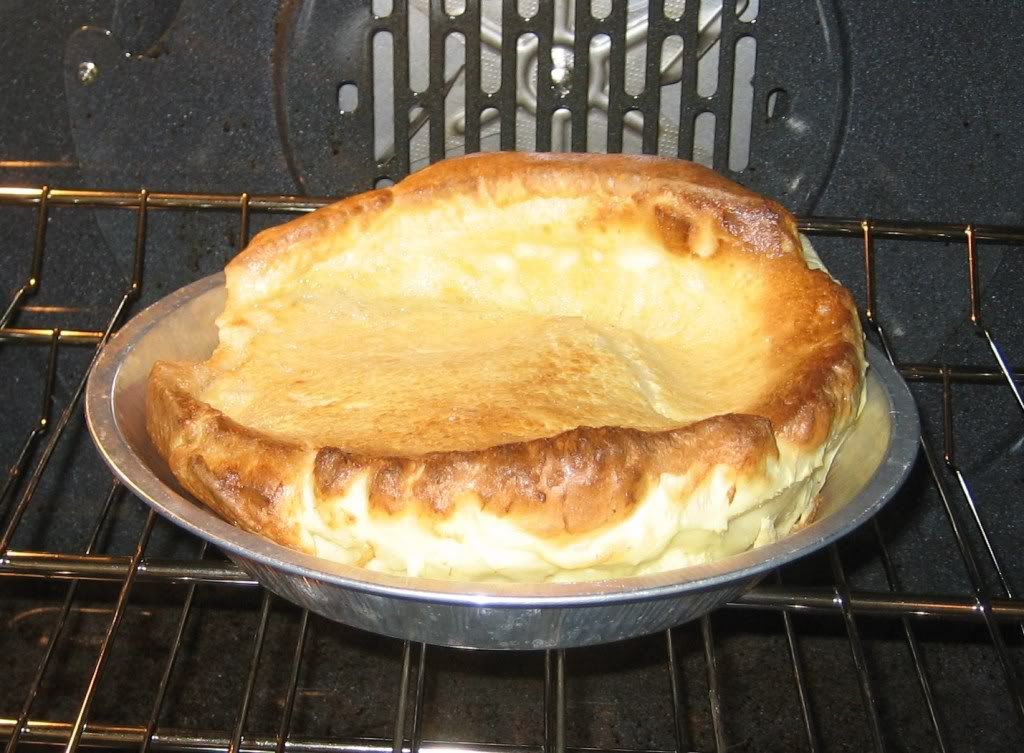
When I was a child we used to sometimes eat at The Original Pancake House. As I remember it we would go on Sunday after church, it was far from home, they were always very busy and we had to wait forever. They had so many good things I had a hard time deciding what to get... There were Pigs in a Blanket, Silver Dollar Pancakes, or the Dutch Baby. Today we're talking about the Dutch Baby. So much do I love these things that when I go back to visit family in California I always have to eat at The Original Pancake House. So about that Dutch Baby... It's a large baked pancake - it gets all puffy, tall and crisp around the sides and moist and custardy in the center melting with whipped butter and dusted with powdered sugar. It is served with additional powdered sugar and lemon wedges on the side. Kind-of a breakfast version of Yorkshire pudding or a giant popover. It is heaven!


This recipe fills my craving for that wonderful pancake. It's very easy to make, I generally make it in a Pyrex pie plate or one leftover from a pie shop pie. It would also cook perfectly in a 10" cast iron skillet 12" is too large. The lemon juice will dissolve much of the sugar and you really do need more sugar on the side in order to strike the right balance between tart and sweet. I got this recipe from the Food Section of the Orange County Register in 1994 (wow! before I was even a bride!)

Oven Baked Pancake

Ingredients:
2 large eggs
1/2 cup milk
1/2 cup flour
1/4 tsp salt
nutmeg, a few grains
1 Tablespoon oil

1) Place oven rack in center position. Set oven temperature to 450 degrees F.

2) Blend eggs, milk, flour, salt, nutmeg in blender (this morning I just beat them with a whisk and it worked fine, just be sure to beat the eggs on their own before adding the other ingredients.) Put oil in pie pan and heat in oven for 5 minutes.

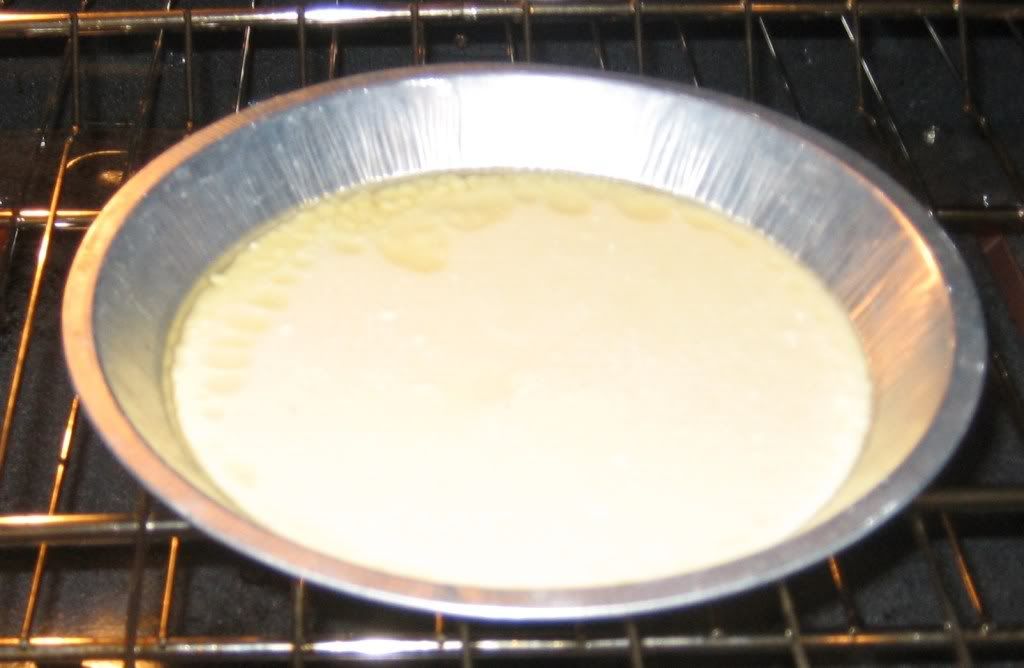
3) When oil is hot, pull oven rack forward and pour batter into pan still on oven rack. Be sure to pour it into the middle of the oil. The oil will spread to coat the pan as you pour in the batter. Push rack back in and Bake uncovered for 18-20 minutes.

4) Cut into wedges, top with butter and drift with powdered sugar. Serve with lemon wedges and small bowl of powdered sugar and serve.

Serves 1 or 2 by itself. Can serve 3 or 4 if served along side additional breakfast foods like sausage, eggs, and fruit.