
Today I'm going to share one of my basics. These are not special occasion eggs, like my Dad's Green Eggs & Ham (which I'll try to get him to share when I am in California next month.) These are the everyday eggs I make for Ethan in summer, on weekends and the occasionally more-together school morning. They are quick, they are easy but there are several tricks to getting them to come out the way they do. Once you know, you can do it. These are Ethan's favorite eggs (well, after those Green Eggs & Ham that Papa makes.) Robert was a cook in the Army so he ROCKS breakfast in short order - he is the breakfast king in our house, but Ethan prefers my scrambled eggs, he will poke questioningly at Robert's cheese laden eggs, sniff them and announce "These aren't Mama's eggs!"
I'm not making an omelet here, don't really like omelets much to tell you the truth. And since I'm being truthful I might as well admit that I won't eat anyone else's scrambled eggs. There is a sulphuric taste to plain scrambled eggs that I can't stand, but I've figured out a way to get rid of it. These aren't made to be pretty, remember it's not an omelet, they're scrambled eggs, they're made for taste.
Mama's Eggs or Perfect Scrambled Eggs
Ingredients listed are for one serving (or 2 if you're making a lot of sides to go with it)
butter or olive oil (for the pan)
2 eggs
salt
half and half (non-negotiable I'll explain in recipe)
pre-shredded cheese, I use cheddar
thyme (fresh or dry) or whatever herb you like. Sometimes I use a touch of red taco sauce, instead
These come out best if you make them one serving at a time. You CAN make up to 3 servings all together in a 10-inch omelet pan, but I recommend beginning with a single serving - its easier to learn to recognize when you're ready for the next step when working with a smaller pan.
Equipment is Important
Use a non-stick pan, that is still non-stick. If your pans are old and stick, get a new one, or just buy a cheap 7 or 8 inch T-fall pan that you can use just for eggs. They're only a few bucks at Target - trust me, you don't want to do this with a sticky pan! I have very good pans, but I make eggs in T-fall there is no shame in it!
I use a flexible spatula that is heat safe (Mine's from Pampered Chef), a Rubbermaid spatula will melt. A flexible spatula works so much better than those flat pancake turners people usually use for eggs!
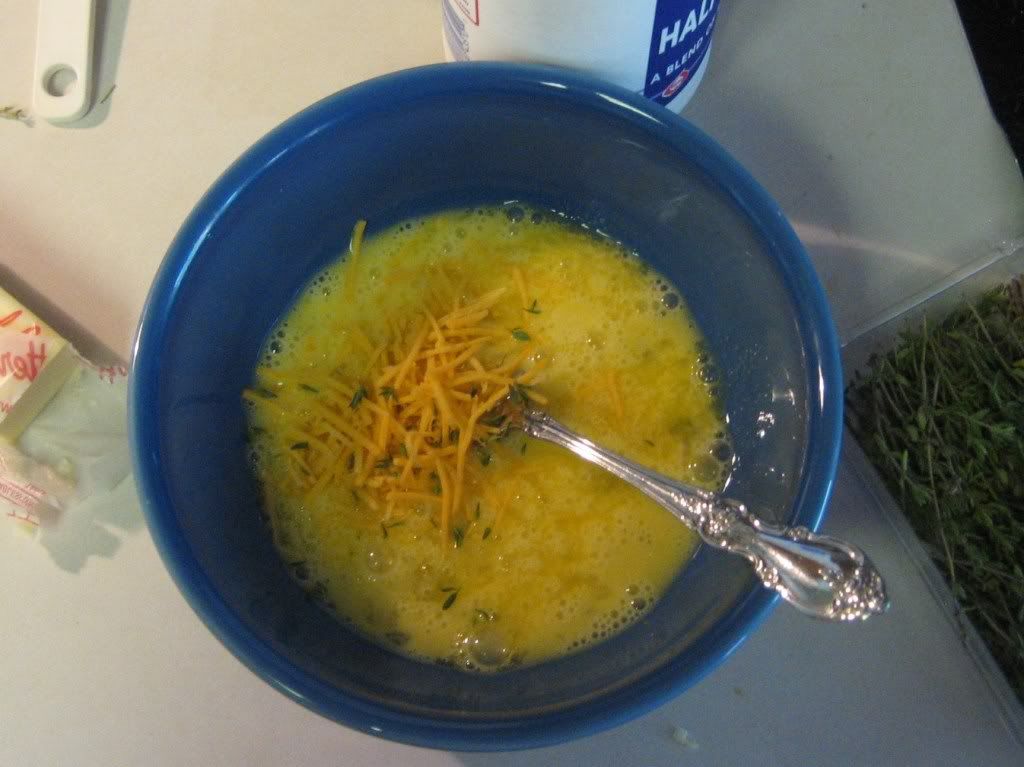
Use a bowl large enough to really be able to mix things up. Begin by beating the eggs with a fork until they are uniformly lemon yellow and you can no longer see any whites floating around on their own. This is IMPORTANT you are forming an emulsion - fancy science term for - mixing them so they won't separate on you later. I find the eggs blend better for me if I add one egg then beat, then add another egg, but you don't have to do it that way (I don't on schooldays.)
Add a pinch of salt. You always want to salt eggs before you cook them, then the salt will be throughout and you won't need as much. This is one of the things that helps to diminish that sulphuric taste I mentioned. Salting eggs after they are cooked makes them rubbery, you don't want that. Trust me and salt them.
Now you're ready to add a small glug of half-and-half. DO NOT USE MILK! Remember that emulsion I talked about... an emulsion is a balance of fat & water that binds together elements that normally don't mix. Milk doesn't have enough fat to hold the emulsion - if you use milk when your eggs reach a certain temperature during cooking the water in the milk will come OUT of emulsion and you'll have watery eggs. Have you even had water on a plate of scrambled eggs and wondered where it came from? That was from using milk. Half-and-half has the right amount of fat in it to stay in emulsion. (Sciency people if I'm making a hash of explaining this forgive me I learn all my food science from Good Eats & Cook's Illustrated - mainly I know that it works - I have never had watery eggs using half-and-half.)
 Now you're ready for flavorings, I add a pinch of pre-shredded cheese, just a pinch, it gives flavor, disappears into the eggs & gets rid of the plain-egg taste. Don't use too much or it won't disappear into the eggs, you'll have cheesy gloppy eggs and you won't be able to tell the difference between eggs that are undercooked, and a pocket of melting cheese. You can stop there or add an herb. Ethan loves fresh thyme in his eggs - use whatever herb you like or have leftover from cooking dinner. If you use the taco sauce suggestion, just use a squirt, be careful not to add too much, taco sauce is watery (remember the emulsion) - you can put more taco sauce (or salsa & sour cream) on top when you serve the eggs if you want.
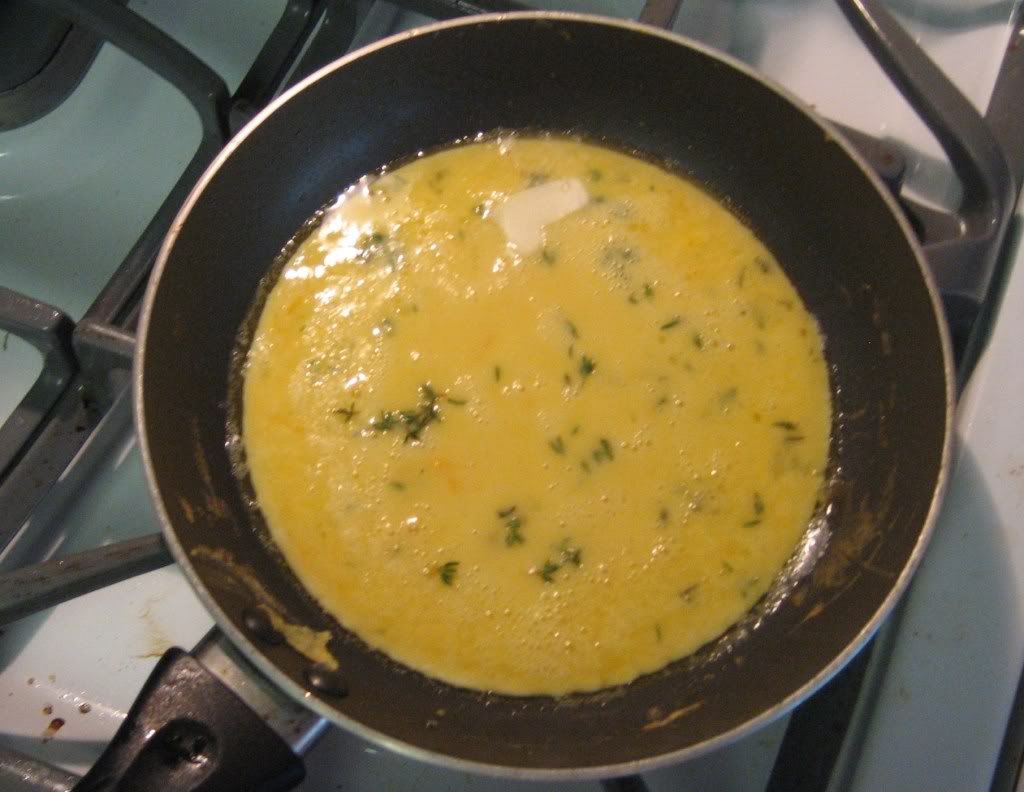
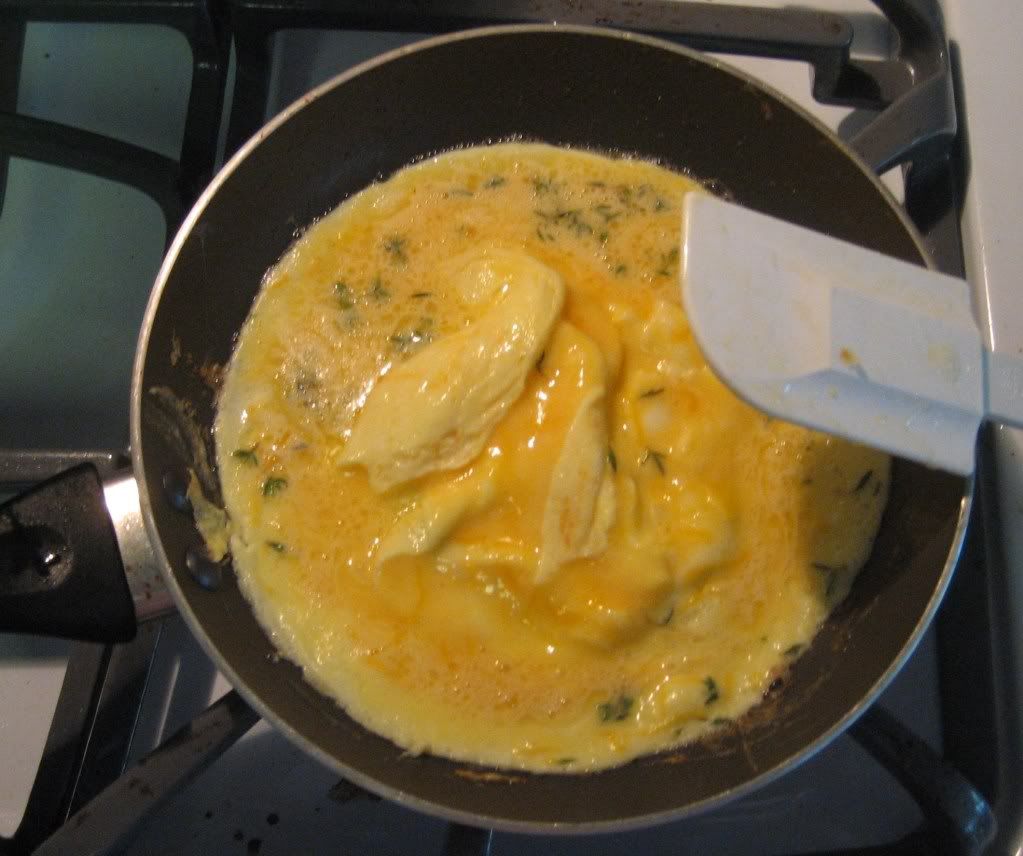
Time to cook. Heat your pan to medium low heat (I use gas you probably need to go lower on an electric stove,) put some olive oil, or butter in the pan. Butter is nice because I know the pan is hot enough when the butter is melted and covers the pan. Pour the eggs into the warm skillet and WATCH the edges. When you see that the edges are beginning to set (figure 1) take your heat safe spatula and pull them into the middle of the pan (figure 2). This forms what are called "curds" they are what makes scrambled eggs fluffy, moist & tasty. Omelets don't have them, that's why I don't like omelets! I have heard that Italians call them "rags" that's a better description of what you're looking for. When the edge are set again, pull the curds toward the center (figure 3) and turn up the heat to medium (if you don't turn up the heat it takes too long to finish the eggs and they can dry out.) When things look puffy (figure 4), flip the curds over to finish cooking on the other side. If you wait until you can flip the whole pan in once piece you'll overcook it. This is not an omelet, it's a scramble, embrace the tasty goodness of the curds, flip pieces as needed. Have your plate ready and turn the eggs out onto it as soon as they are done. Even off heat the difference between perfect & overcooked is a walk to the kitchen table - the eggs will continue to cook a tiny bit on the plate, so start thinking about getting them onto the plate when they are almost ready - by the the time you get them there, they'll be ready.
1 2
2 3
3
(1-edges set, ready to begin forming curds (2 -forming curds (3 after forming curds 2nd time
4 5
5
(4 ready to flip (5 done, time to eat!
1
 2
2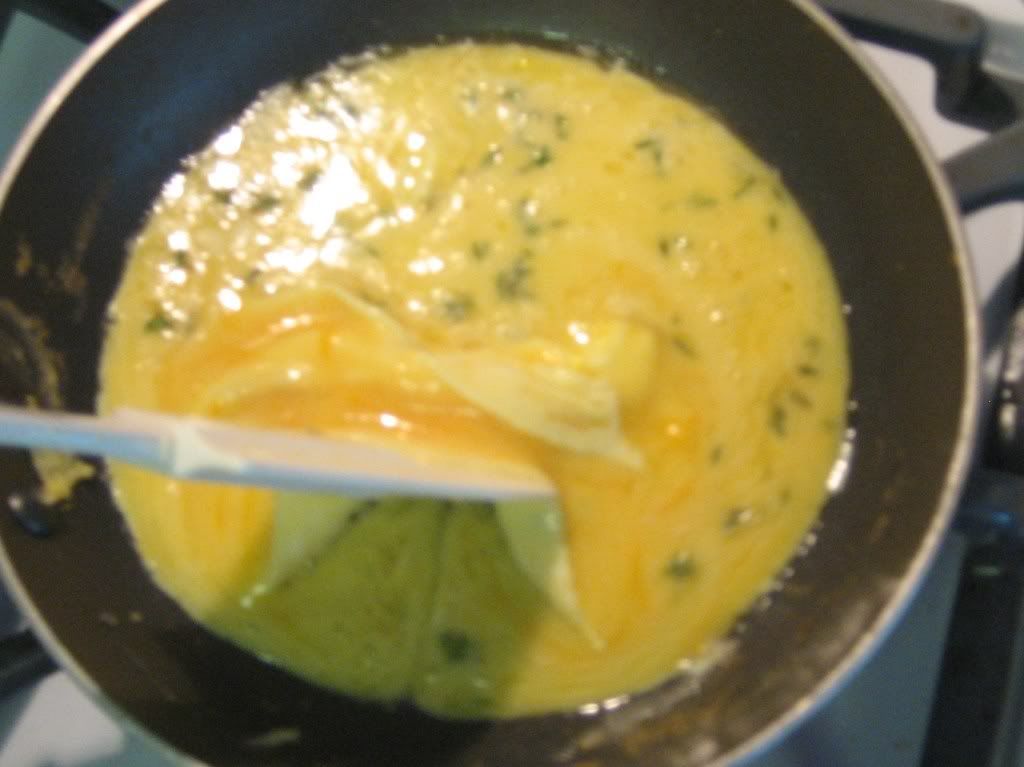 3
3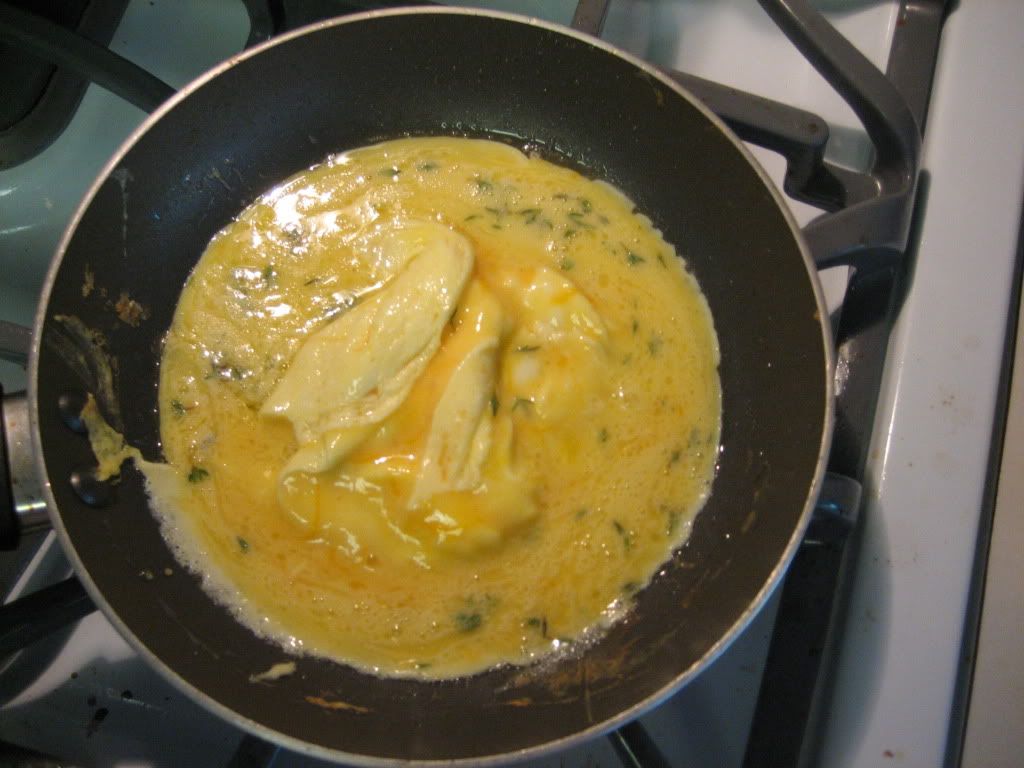
(1-edges set, ready to begin forming curds (2 -forming curds (3 after forming curds 2nd time
4
 5
5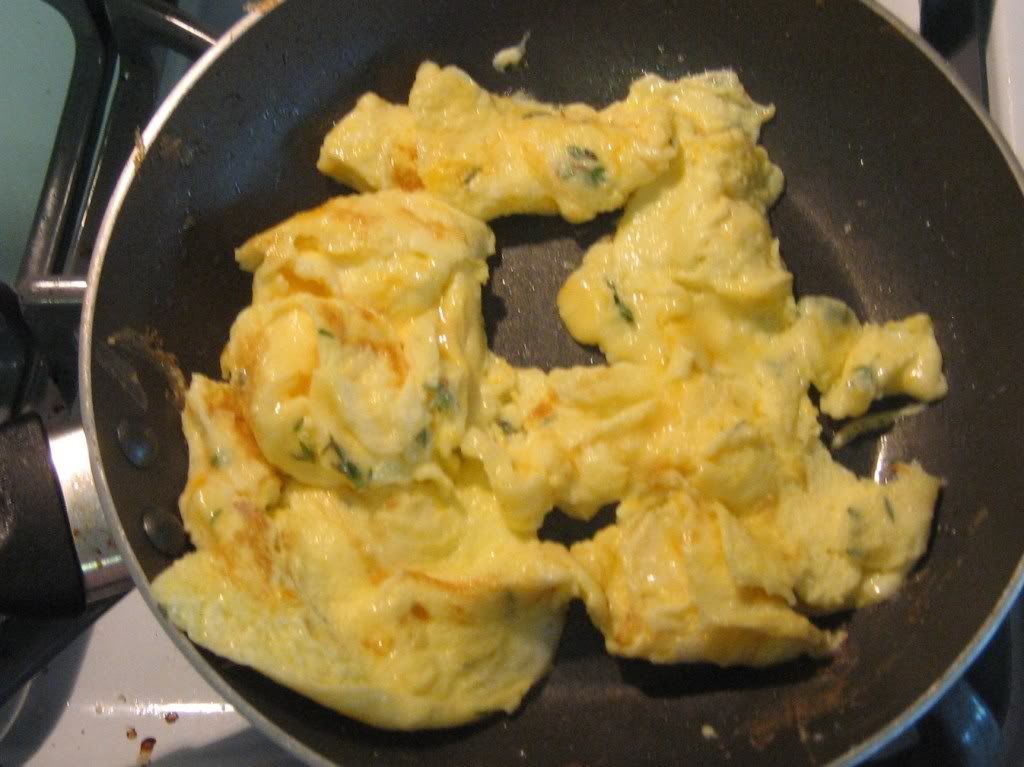
(4 ready to flip (5 done, time to eat!
Don't be daunted by how long this recipe is. These eggs are really easy, I've just taken the time & space to tell you how to do it, and explain what can go wrong & why so you can avoid it. I hope you'll try these eggs. It's a basic that doesn't get instructed very often. This is an amalgamation of things I have learned over a number of years from many sources. Scrambled eggs was the 2nd thing I learned to cook when I was a child (french toast was first, I asked to be taught so I could make it whenever I wanted it.) From Dad I learned that scrambled eggs should be moist, how they look when done, and not to overcook out of fear. I learned the thing about beating eggs & adding cheese before cooking by trial and error. I learned WHY beating the eggs worked (emulsion) from Alton Brown's show, Good Eats and I learned about salting & using half-and-half from America's Test Kitchen. So here are 30-some years of gathered info for you in one recipe. Now, eat your eggs!


5 comments:
Great post! I'll try it!
What great tips! I'll definitely have to give your scrambled egg recipe a try. :) And, I don't think that I've ever tasted thyme. So will have to try that too.
April, I made scrambled eggs for my 6 year old tonight using your perfect eggs technics. You are right! They were the best scrambled eggs I've ever tasted. Thank you for sharing your knowledge and the photos really helped in understanding.
Kim, I'm so glad you gave them a try and enjoyed them.
Can't wait to try this, April.
BTW ~ I found this from your link over at gspn forums.
Post a Comment