Pages

Thursday, October 30, 2008

Halloween Teacher Treats

Today I made these for Ethan's teachers and bus drivers. Ethan colored the pumpkins, my marker tips are a little mashed but it's worth it because he is SO proud of his contribution and wants to make MORE for everyone!


These are so easy to make.
Begin with a regular size envelope (3 5/8" x 6 1/2") plain envelopes are best, but they only had security envelopes at the market, today so that had to do.

Seal the envelope flap shut.
Random stamp the front of the envelope. I used Happy Haunting (retired) and October Word Puzzle - in Black and orange.

With a pencil, trace the curve from the pattern onto the 2 corners of the back of the envelope. Cut using decorative scissors.

Stamp and color the pumpkin on a white square, mount it on black. Tie a bow with black grosgrain ribbon use a glue dot to adhere the ribbon.

Fill with (flat) candy.
Easy, Easy, Easy

Here is a hint on how to make your pattern even. Cut a sturdy piece of cardstock or cereal box to the size of the envelop, freehand draw the curve onto one side of the pattern and cut it out (remember you want to have some handle left in the middle so be sure not to go all the way to the center on top.) Once you have cut the first side, flip over the piece you cut and line it up to the corner on the other side. Now you can trace the line and your two sides will be even. You can use this same cut and flip technique to make the sides even when creating a tag.

All supplies by Close To My Heart
Stamps: Happy Haunting, October Word Puzzle
Colors: Black, Orange, Clover Meadow

Wednesday, October 29, 2008

Halloween Gift Card Reading is a TREAT Card

This is one of my favorite stamp sets, the kids remind me of the Lemony Snicket books for some reason (not the movie, just the books)
When I first made these cards, the concept was to promote reading. So they have a bookmark in the pocket in front and a spot for a gift card for Barnes and Noble or other bookstore in the pocket on the inside. The greeting I came up with for inside was,

"It's no TRICK
Reading is a TREAT!
click photos for larger view.

This card is 8"x3.5" made to fit inside a standard legal envelope.
The base is made out of Olive cardstock it is 7"x8". If you want to print a sentiment on the inside now is the time to do it, before you begin to assemble the card. Random stamp bats in black over the right half of the card, then fold it half to make the card. Next cut a strip of black cardstock which you will use to form the pockets 6.5"x 3.5. Score the strip in the middle at 3.25." Stamp Happy Halloween with White Daisy ink. Now attach the scored strip to the card using white eyelets. This will give you a pocket both inside and out. The fold is at the bottom (rather than the side) so things can't drop out the bottom of the pocket.

Inside Pocket and Bookmark

The bookmark is 7"x2.5" and the base is Pansy Purple. Cut a piece of Goldrush 6.75"x2.25" and layer them together. Stamp your images on a strip of cardstock that is 1.75" in width and cut to the right height for your images. Now mat on black cardstock that is .25" wider and .25 taller than your white piece. I colored the images using a waterbrush and re-inkers. I used a marker in Vanilla Cream to color the skin-tones. Add the squares to the bookmark and finish with Three Black eyelets across the top of the card. I put my bookmark into a protective vinyl bookmark sleeve purchased from http://clearbags.com/ I trimmed off the triangle top so the sleeve was the same height as my bookmark.

All Supplies by Close To My Heart
Stamp Set: Halloween Dingbats (retired)
Colors: Olive, Archival Black, Pansy Purple, Goldrush, White Daisy, Vanilla Cream, Desert Sand
Waterbrush, Eyelets, Re-inkers, Vinyl Bookmark Sleeve

Thursday, October 23, 2008

Preparing Casseroles for the Freezer

Casseroles are one of those things that it is just as easy to make 2 as 1. So I like to make a double batch and fix one casserole for that night, and put a second into the freezer. It's a great way to plan ahead for a busy day. There was a time I had so many casseroles in my freezer that sometimes didn't have a pan to bake a cake in (because they were all in the freezer with casseroles frozen in them.) So here is a handy solution to that problem.

Last night I multiplied the recipe by 1 1/2 so that I would have enough for 2 generous 9"x9" casseroles. I have a small family and a husband who travels a lot, so the 9x9 size works better for us than a standard 9"x13" casserole.

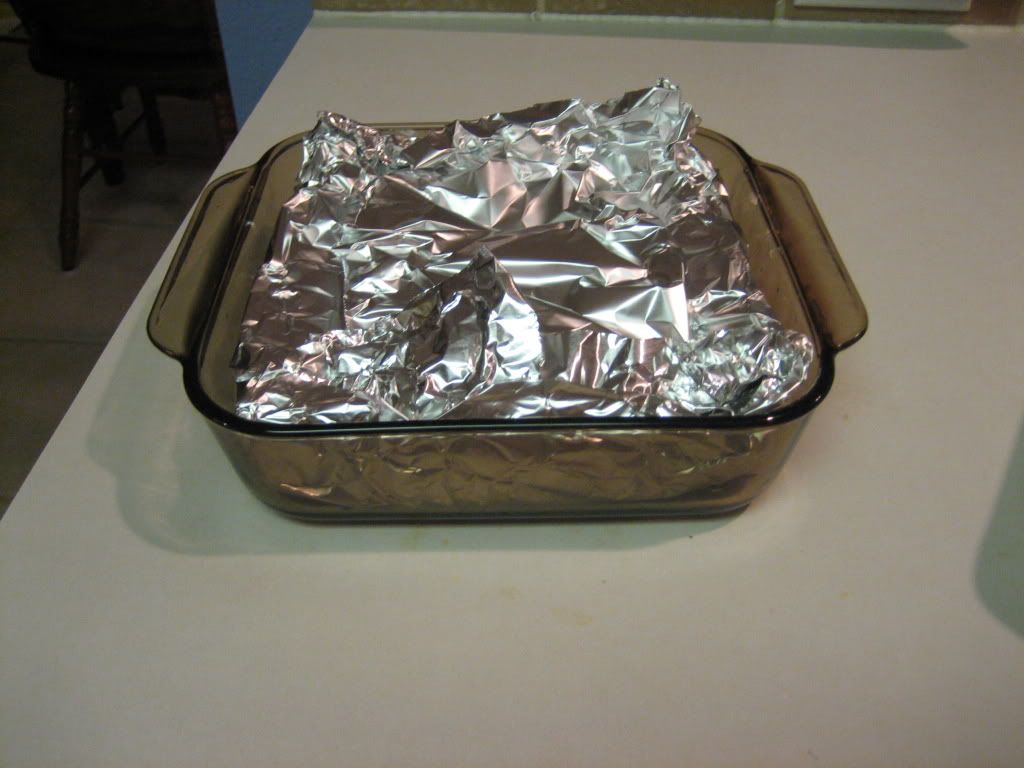
Baking dishes: Be sure your baking dish is one that can go safely from the freezer to the oven. Some materials will shatter from thermal shock if they go from being very cold into a hot oven. For this reason I use Pyrex when I freeze casseroles.

Prepare your casserole filling.

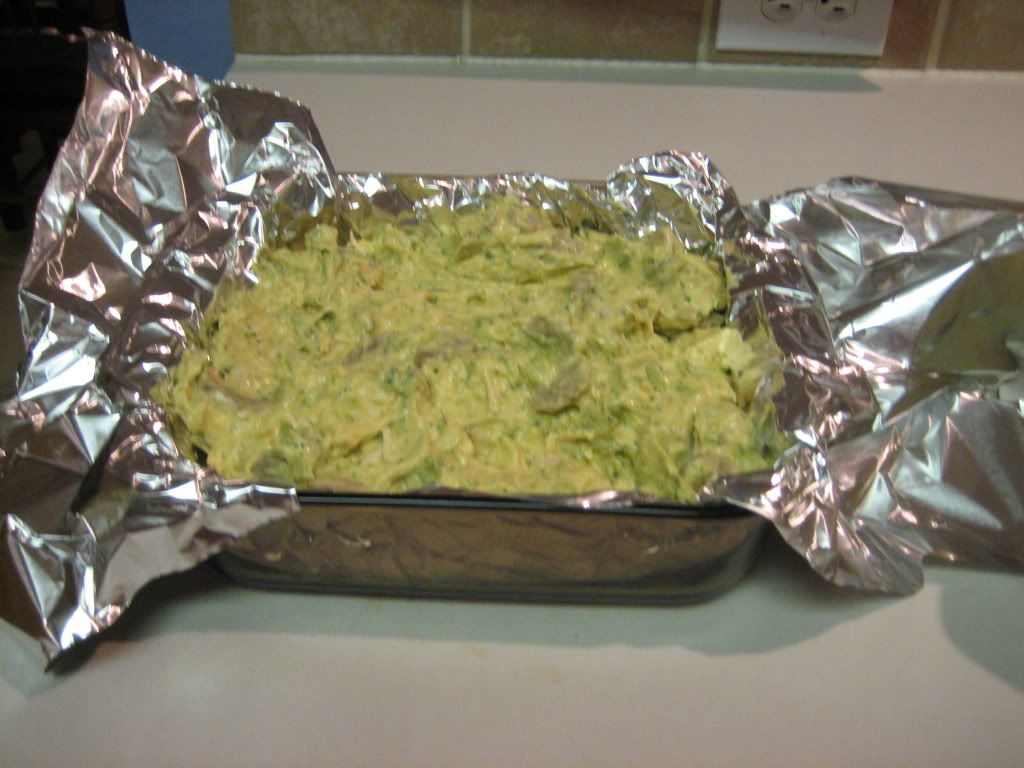
Line the baking dish for the casserole you want to freeze with 2 layers of Heavy Duty Aluminum Foil. You need 2 layers so you will be sure to be able to get the casserole out of the pan. The first layer only needs to be as large as the pan and actually you can use plastic wrap, or parchment paper, or even wax paper for this layer. The second layer needs to be foil and you want to leave enough extra that you will be able to fold the ends over on top to seal up the casserole in the foil.

Fill your lined dish with the filling, fold the foil over the top and place in the freezer until frozen solid.

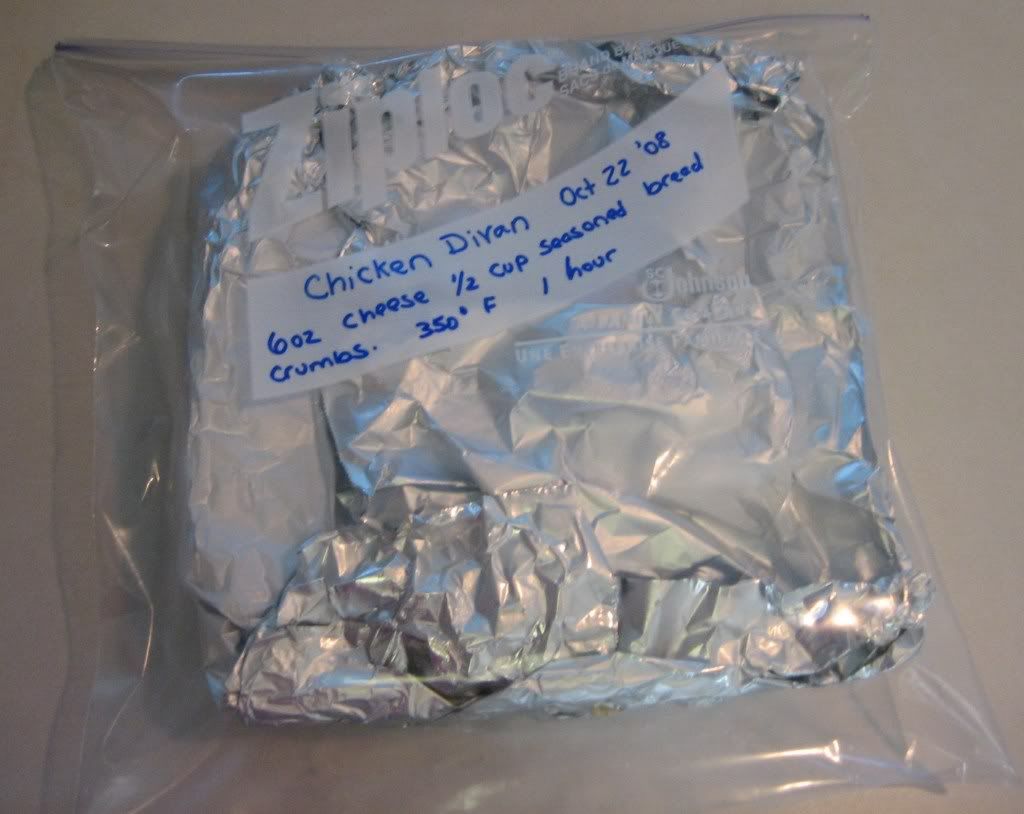
When your casserole is frozen thru, remove the frozen casserole from the dish - if you used a layer of parchment, wax paper, or plastic wrap or anything that is not oven safe - remove and discard that layer. You now have a frozen casserole that can be wrapped and returned to the freezer - while you are free to use the pan for other things.

A 9"x9" casserole will fit into a gallon size freezer bag, I like to label the freezer bag with the contents, the date, and any baking instructions. A Sharpie marker will not bleed in the freezer. If your casserole is too large to fit into a freezer bag - wrap it tightly with more foil or plastic wrap.

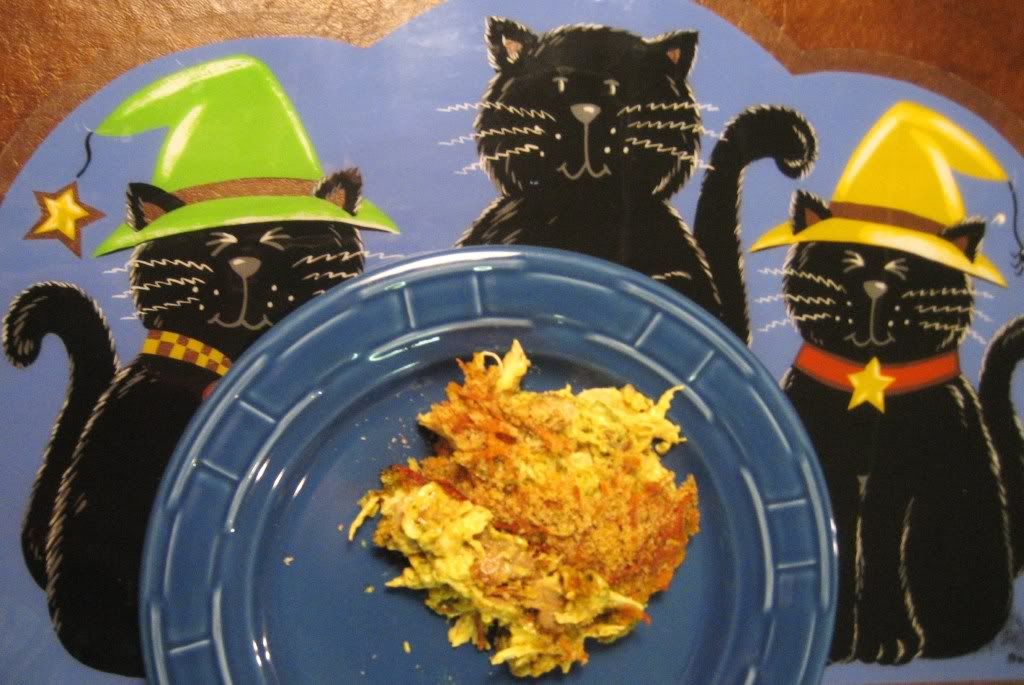
When it is time to prepare the casserole, remove it from the freezer bag. Place the foil-lined casserole back into the original dish and place it in the refrigerator to defrost for at least 24 hours, then top and bake. You may need to adjust your baking time a little longer depending on how cold it was when it went into the oven. I often let the casserole sit out on the counter for 20-40 minutes in order to take the chill off before baking.

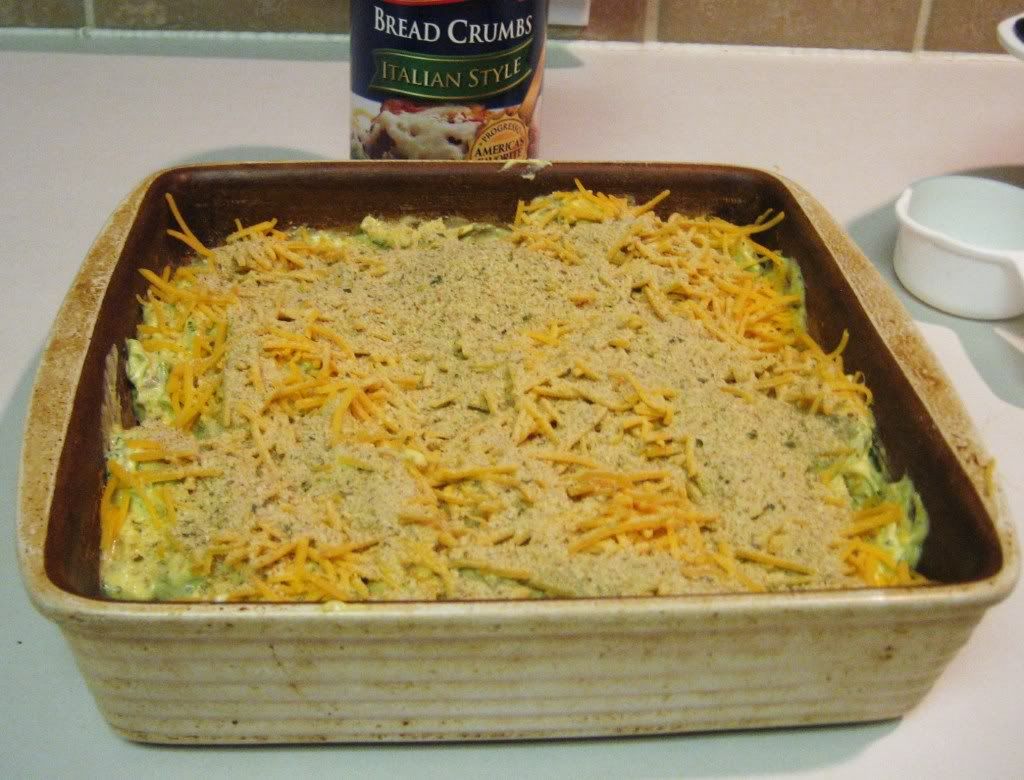
A note about toppings.... Crispy toppings should be left off the casserole before freezing, and added just before baking. Cheese also does not freeze well. A good rule of thumb is, if the cheese is mixed into the casserole filling it will do fine, but if a casserole calls for cheese on the top, leave it off before freezing and add fresh cheese when you bake the casserole.
Chicken Divan Recipe

I hope you find this helpful!

Wednesday, October 22, 2008

Chicken Divan

Chicken Divan, I think every family has a casserole like this, one for which everyone seems to have the recipe. It turns up at a lot of church potlucks and family reunions and you are always glad to find it familiar and comforting. This recipe comes from my mother who got it from her Aunt, Cay Hedges. I like to keep track of the origin of recipes and the year I started making them. Recipes can become family traditions, passed from generation to generation. Years in the future it can be interesting to see where they came from and how long they have been in the family.
Mom topped this casserole with cheese only, I discovered the bread crumb option when I copied the recipe for my own recipe box when I got married. Putting the bread crumbs over the top of the cheese creates a crunchy and flavorful topping which I always include. Tonight I multiplied the recipe by 1 1/2 and divided it between 2 9x9" square dishes and put one in the freezer for a future dinner. Preparing Casseroles for the freezer.

Chicken Divan

3 cups cooked chicken
1 can condensed Cream of Mushroom soup
1 can condensed Cream of Chicken soup
1 cup mayonnaise
1 Tablespoon curry powder
1 Tablespoon lemon juice
1 box frozen chopped broccoli
8 oz jar of sliced mushrooms
6 oz grated cheese
1 cup of seasoned bread crumbs (optional)

Cut chicken into pieces. I usually like using shredded chicken for casseroles, but in this dish I think it is better to cut the chicken into pieces.
Cook broccoli according to package directions and set aside.

In a large bowl mix together mayonnaise, soups, curry powder and lemon juice. I like to use a whisk to mix them together and because I love curry, I use extra curry powder. While many of them are fine for salads and cold dishes, I don't recommend reduced fat mayonnaise or reduced fat soups for cooking, they just don't bake up with the same consistency.

Mix in broccoli, mushrooms and chicken. Place into a 9x13 or 3 qt. casserole dish. Top with cheese (use your own discretion about how much depending on the size of your baking dish.) Sprinkle seasoned breadcrumbs over the top of the cheese.

Bake at 350 degrees F. for one hour.

Tuesday, October 21, 2008

A Man Of Few Words

This is what I have been thinking about, today...

My Grandpa Black was a missionary. He was born in 1901 so he was already well advanced in years and had numerous great-grandchildren by the time that I was born. He wore a hearing aid and I thought he didn't speak much because he was so old and because he didn't hear well.

I will never forget the day I saw Grandpa with something to say.
My grandparents had 5 boys and enough years had passed... well, the family had taken heart the instruction to be fruitful and multiply. There were a LOT of us. It took a bit of doing to get everyone shushed up even for a prayer so we could start the buffet line... but on that day when Grandpa had something to say... I never saw the like of it.
He didn't say "ahem" or "Everyone gather around now I want to say something." He didn't stand up or flourish his arms like a preacher at a podium. Just where he sat with his back to half the room, he just started talking in his soft voice to the 3 or 4 people who were gathered around him in conversation. Immediately there was a hush, you could feel the room leaning forward to hear what Grandpa had to say.

It was exactly like an EF Hutton commercial.

In later years I learned it was not old age, Grandpa had always been a man of few words or rather a man who deliberately chose his words. That day I learned a lesson that teaches me now from across the years.

When he spoke people listened because from the strength of his character they knew it would be something of worth. Because he spoke seldom there was little doubt that when he chose to speak it would be something worthy of words.
I wish I could call back the words he spoke and the wisdom that he offered... but I will have to be content with the lesson of his example...
Be deliberate not only in what you say, in the choosing of your words, but also in when you choose to speak at all.

Friday, October 17, 2008

Goodness of Life, Baroque Alphabet Thanks Card


I love the Baroque Alphabet it is so easy to make something quick with a monogram.
This card gives the impression of 3 dimensional frames because of the mitred looking corners.
I cut 2 squares of Cardstock one Hollyhock and one black, then cut each one in half diagonally using my paper trimmer. I did the same with smaller squares to frame the Monogram. The card is 6"x6" size.

Stamps: Baroque Alphabet, Goodness of Life
Cardstock Colors: Black, Hollyhock, Blush, White -- Ink Colors: Hollyhock & Black

Wednesday, October 15, 2008

Chocolate Chunk Bread Pudding

We've had two days of rain and tonight I was in the mood for something warm and comforting. This dessert is so delicious. I found it in a Pampered Chef Cookbook - Cooking for Two and More. Croissants form the base for this bread pudding, soaking up a delicious custard which is studded with chocolate gems. The top is sprinkled with sugar and becomes crisp like french Palmiers pastry. Be sure to use bittersweet chocolate, it makes a wonderful counterpoint to the sweet custard. I have made 3 changes to the original recipe...
First - I love the increased richness of the custard which comes from using whipping cream instead of the original half and half.
Second - I use Girardelli Bittersweet Chocolate Chips. I prefer the large gems of chocolate instead of the fine flake I got when coarsely chopping block chocolate.
And finally - I added cinnamon to the sugar that is sprinkled on top. Chocolate and cinnamon truly are a wonderful combination.
Enjoy this easy recipe which strikes a wonderful balance between creamy and crisp, bitter and sweet. It makes a lovely desert or a decadent breakfast with tea, coffee, or Mexican drinking chocolate.


2 eggs
2/3 cup whipping or heavy cream, unwhipped (or half and half)
1/4 cup sugar
1 teaspoon vanilla
2 medium croissants, cut int cubes
1 oz bittersweet chocolate chips (scant 1/4 cup)
1 tablespoon sugar
1/8 teaspoon cinnamon

1) Preheat oven to 325 F. Lightly spray mini baking dish with non-stick cooking spray (pie plate size or smaller.)
2) Whisk eggs one at a time, then whisk in Whipping Cream, vanilla and 1/4 cup sugar.
3) Place croissant cubes into baking dish; top sprinkled with chocolate chips. Slowly pour egg mixture over croissants; let stand 10 minutes.
4) Mix together remaining 1 tablespoon of sugar and cinnamon and sprinkle over top.
5) Bake 34-40 minutes or until top is deep golden brown and thermometer reads 160 degrees F. 6) Remove from oven and cool for 10 minutes before serving.

Monday, October 13, 2008

Uptown Girls Card

This is one of my all time favorite stamp sets and how can you go wrong with black and pink.


I like to stamp with Archival Black Ink, it's just deeper and richer than regular black and once its dry it won't run when you color. The image is colored with markers. Girly Girl is stamped on vellum in Archival Black Ink.
All supplies by Close To My Heart
Stamps: Uptown Girls, Girly Girl
Colors: Archival Black, Baby Pink, Desert Sand

Thursday, October 9, 2008

Stamp Storage Question Answered

I had the following question in response to my post about my Craft Room.

YOU DID A FANTASTIC JOB...TELL ME HOW DO YOU SORT YOUR STAMPS IN YOUR STORAGE BOXES? AND THEN KEEP TRACK SO YOU DON'T HAVE TO GO THROUGH EACH BOX TO KNOW WHAT IS IN WHAT?
THANKS BETH A ROOKIE!
(((((HUGS)))))) GREAT JOB KIDDO!

Thanks, Beth!
I really am happy with my newly organized stamp room.

I will start with an overview of my stamp organization system and explain in more detail below.

I store my stamps in the My Acrylix Organizers according to Color Coded Category.
I have a clear label on each box with the category name of stamps in each box (made with my Dymo label maker.)
I keep an Inventory Listing of all my Acrylix stamp sets in a Microsoft Excel File.
All E-sized stamp sets are stored in a large white 3 ring binder.

Click photos for larger view

Inventory Listing Microsoft Excel File
Sometimes when I'm looking for a stamp set, I can not figure out how a particular stamp set would be categorized so I look it up in my Stamp Set Inventory. I have inventoried all of the stamp sets that I own in a Microsoft Excel Spreadsheet and I just look up the name and see what color/category it says. Then I know which box to look in (it also helps me keep track of which stamp sets I own.) When I receive an order of stamps I sit down and put my initials on the stamp set with a sharpie marker, then I log the stamp set into my Inventory file in Excel.

Each stamp set is on a line by itself, the information I track is Item Number, Stamp Set Name, Color, Category, Status. I use the Status field to indicate Retired, Stamp of the Month or Special stamp sets - for regular stamp sets I leave the status field blank. With more than 100 stamp sets this is a quick way to know what I have & where to find it. I can quickly re-sort the information by any category to quickly find what I am looking for.

Color Coded Category
Did you know that Close To My Heart stamp sets are color coded by category?
Categories and Colors are as follows:

Alphabet - Indian Corn Blue
Animals, Outdoor, Travel - Topiary
Autumn - Olive
Celebration - Amethyst
Everyday Life - Crystal Blue
Frames, Tags, Borders - Lilac Mist
Sentiments - Pink
Spring - Yellow
Summer - Sunflower
Winter - Desert Sand

And that is how I organize My Acrylix Stamp Sets. If you have further questions, leave a comment (Click COMMENTS below) and I'll answer here so all the info is in the same place.

New Shelves in Craft Room

This is my stamping and scrapbooking area. Having supplies organized on this main work station has made such a nice change. Now I love to work in this room crafting or on my laptop. The white desktop makes it lighter and brighter than the old dark table that I had before.


Click Photo for Larger View

I have a lot of challenges in this room. Every wall has some obstruction to it, windows, closet doors, or access pathways into the room or closets...

This is an elfa shelving system from The Container Store. The entire system hangs from a support strip across the top. Robert installed the top strip for me, then I was able to place the standards (vertical keystrips) and brackets and shelves, myself. The beauty of this system is that I can change it around whenever I want to fit what I need at the time. I'm able to make the shelves whatever height I need and have a few options of shelf depth as well.

The desktop I am using at the bottom is 24" deep. It is completely supported by brackets on the key strips. NO TABLE LEGS AT ALL. I can zip all over in my rolling office chair and never bang my knees! At the back of the desk area I have Sterilite Show Off containers (Walmart) without their lids as storage for embellishments, distressing kit, and a power strip for plugging stuff in without having to crawl under the desk.

The next shelf up is 8" deep and holds my Ink Stak ordered from Stamper's Storage. I have the ShortStak which holds 60 ink pads and markers. I need Robert to paint it white for me. However, I am considering switching to the new carousel Exclusive Inks organizer from CTMH as that would free up a whole shelf of storage space. The small frosted drawers on the left (Container Store) hold adhesive and acrylic stamp blocks.

The next two shelves hold my stamps, sassy strands, buttons and flat packaged accessories. My Acrylix Organizer boxes are from CTMH.

The top shelf is 12" deep and holds (from left) my design books, binder for E-Size stamp sets, and My Accent, Eyelet, and Ribbon Rounds Organizer Cases. Finally all of my solid cardstock is at hand stored in Vertical Storage Files (Cropper Hopper.)

Tuesday, October 7, 2008

Thanks Gourmet Momma - Crispy Pork Cutlets

Quite awhile back I submitted an "Ask the Chef" question to Gourmet Momma over at GourmetMomma.blogspot.com about getting chicken breasts to cook all the way through. She posted a wonderful solution with step-by-step-photos back on September 1st. Click Here to see her answer.

Well I haven't happened to have made chicken since she posted her answer but on the very day I read her answer I had bought thick pork chops to make for dinner - you know the ones you buy in bulk at the club stores. Well her chicken solution got me to thinking - I always see recipes that call for pork cutlets and nobody around here seems to SELL pork cutlets. So armed with the how-to photos I decided to make cutlets out of my chops and make a new recipe out of America's Test Kitchen, Fast & Fresh 64 Suppers 30 Minutes or Less. They were delicious and the leftovers reheated well in the oven on a stoneware pan --- THANKS Gourmet Momma! Click Photos for larger view.

To make your own cutlets. Place Boneless Pork Chop on cutting board. Place left hand flat on top of pork chop. Cut chop in half working slowly with a very sharp knife held parallel to the cutting board. I was able to get 3 cutlets out of each pork chop. Click Link above for Gourmet Momma's more detailed tutorial.

Crispy Pork Cutlets

5 slices hearty white sandwich bread, torn into pieces
1/2 cup all-purpose flour
2 large eggs
2 tablespoons Dijon mustard
8 boneless pork cutlets (3-4 ounces each), about 1/4 inch thick
Salt and pepper
1/2 cup vegetable oil

1. Adjust oven rack to middle position and heat oven to 200 degrees. Pulse bread in food processor until coarsely ground; transfer to a shallow dish. I ground the bread in small batches in my blender. Place flour in second shallow dish. Beat eggs with mustard in third shallow dish. Pat pork dry and season with salt and pepper. One at a time, coat cutlets lightly with flour, dip in egg mixture, and then dredge in bread crumbs, pressing to adhere. I tried out my new Pampered Chef Coating Trays. They were so handy. The rectangle shape took up less counter space than the 3 pie tins I usually use, and because they clip together I didn't have drips all over my counter. When I was finished they went in the dishwasher and they nest for compact storage - very handy! Place coated cutlets on a platter with wax paper between each layer.


2. Heat 1/4 cup oil in large nonstick skillet over medium-high heat until just smoking; a cast iron skillet is perfect for this. Fry half of cutlets until deep golden and crisp, about 3 minutes per side. Drain on paper towel-lined plate and transfer to oven on stoneware or baking sheet, to keep warm. Wipe out skillet and repeat with remaining oil and cutlets. I used the same oil for all 3 batches but it didn't seem to hurt anything.

The magazine suggests serving these with buttered egg noodles tossed with parsley, but I was in comfort food mode on this day. I served it with Smashed Potatoes and Grandma's Cabbage. That was a bit ambitious, too many pots and dishes going all at once and too much food! Next time I will just serve it with the cabbage. I will share the cabbage recipe soon. Click Here for link to Smashed Potatoes Recipe.

Saturday, October 4, 2008

Simple Blossoms Card

Happy World Card Making Day!


Sunflower Card Base Random Stamped with Outline Images in Sunflower Ink
White Strip of Cardstock Random Stamped with Solid Stamps, then overstamped with darker or contrasting ink with outline stamps.
Red flowers stamped by inking Solid Stamp in Holiday Red ink then stamping off ink on scratch paper then stamping on project. This gives a lighter intensity of the same color and is called 2nd Generation Stamping. Then ink the outline stamp in holiday red ink and stamp as usual.

All supplies by Close To My Heart
Stamps: Simple Blossoms
Colors: Citrus Leaf, Clover Meadow, Sunflower, Holiday Red

Friday, October 3, 2008

Oven Baked Pancake

Sorry no posts for awhile - I've been down, feeling lonely this week.

When I was a child we used to sometimes eat at The Original Pancake House. As I remember it we would go on Sunday after church, it was far from home, they were always very busy and we had to wait forever. They had so many good things I had a hard time deciding what to get... There were Pigs in a Blanket, Silver Dollar Pancakes, or the Dutch Baby. Today we're talking about the Dutch Baby. So much do I love these things that when I go back to visit family in California I always have to eat at The Original Pancake House. So about that Dutch Baby... It's a large baked pancake - it gets all puffy, tall and crisp around the sides and moist and custardy in the center melting with whipped butter and dusted with powdered sugar. It is served with additional powdered sugar and lemon wedges on the side. Kind-of a breakfast version of Yorkshire pudding or a giant popover. It is heaven!


This recipe fills my craving for that wonderful pancake. It's very easy to make, I generally make it in a Pyrex pie plate or one leftover from a pie shop pie. It would also cook perfectly in a 10" cast iron skillet 12" is too large. The lemon juice will dissolve much of the sugar and you really do need more sugar on the side in order to strike the right balance between tart and sweet. I got this recipe from the Food Section of the Orange County Register in 1994 (wow! before I was even a bride!)

Oven Baked Pancake

Ingredients:
2 large eggs
1/2 cup milk
1/2 cup flour
1/4 tsp salt
nutmeg, a few grains
1 Tablespoon oil

1) Place oven rack in center position. Set oven temperature to 450 degrees F.

2) Blend eggs, milk, flour, salt, nutmeg in blender (this morning I just beat them with a whisk and it worked fine, just be sure to beat the eggs on their own before adding the other ingredients.) Put oil in pie pan and heat in oven for 5 minutes.

3) When oil is hot, pull oven rack forward and pour batter into pan still on oven rack. Be sure to pour it into the middle of the oil. The oil will spread to coat the pan as you pour in the batter. Push rack back in and Bake uncovered for 18-20 minutes.

4) Cut into wedges, top with butter and drift with powdered sugar. Serve with lemon wedges and small bowl of powdered sugar and serve.

Serves 1 or 2 by itself. Can serve 3 or 4 if served along side additional breakfast foods like sausage, eggs, and fruit.