
This is my favorite way to make Hot tea. I have a local Teavana store that I shop at which is very handy for selecting teas, but they are also online. Teavana Online I have given quite a number of these tea infusers as gifts. Lo and Behold they now have a YouTube video so I can show you what I'm talking about.
I place my loose tea & German rock cane sugar in the infuser, add my hot water & allow the tea to steep for 4-5 minutes depending on the variety of the tea. Then I set it on top of my mug & it strains the tea into my mug. The infuser I have makes a 16oz cup, but I just fill it with water up to the bowl the little man is holding & that is an 8oz cup. I'm a tea sipper, so if I made 16oz cup it would get cold long before I drink it. If I'm getting near the bottom & want more, I just start another cup brewing. My husband is strictly a tea drinker, he hates coffee, and he has his own tea infuser for work.
Flavors:
I love the German Rock Cane sugar they sell at Teavana, it tastes so much better with tea that normal white sugar. I have several favorite tea flavors. Rooibos Orange is one of my alltime favorites (I ruined 3 tins before I found a tea-rista who was able to tell me it was the orange rind in this tea that was warping the sealing ring on my Teavana tin - now I keep it in a plastic container) I also love Silver Needle a white tea with wonderful health benefits & a very light flavor, I often mix it with Rooibos Orange or brew it on its own, then strain it into a mug with a Bigelow Earl Grey teabag in it. I like the flavor of Bigelow's Earl Grey, but it's so strong, I fish it out as soon as the tea is finished draining over it.
Another great group of teas are the Matte's I really like Matte Vana with milk, sometimes I blend it with Rooibos Chai (this is not your traditional chai, if you're looking for that look in the section for black teas such as Masala Chai.) Thai tea Blend is another very tasty option full of flavors of coconut, almond and vanilla.
It looks like Rooibos Caramel has been discontinued :(
I have allergies to most fruit, so I have been very limited in the past as to what flavored teas I can drink. Teavana has such a wide array that I am able to find a ton of different flavors to try.
My husband, who is not fruit impaired is a fan of Rooibos Tropica blended with Peach Tranquility.
Teavana is good at blending teas. They have a number of suggestions on their website and will blend the teas for you if you so desire... however... being the kitchen tinkerer that I am... I prefer to get the flavors separately so that I can do my own mixing and matching & tinkering at home.
Teavana has a huge variety of teas in several different categories... I like that they give information about health benefits and give me an idea about the differing amounts of caffeine in the different types of tea.
I boil water in a Krups Electric Water Kettle. Automatic, cool-to-the-touch, a kettle that lifts of the cord base, and auto-shut-off... Stove-top tea kettles are very charming to look at, but once I used an electric kettle, I will never go back!
Showing posts with label Equipment. Show all posts
Showing posts with label Equipment. Show all posts
Monday, January 4, 2010
Sunday, December 20, 2009
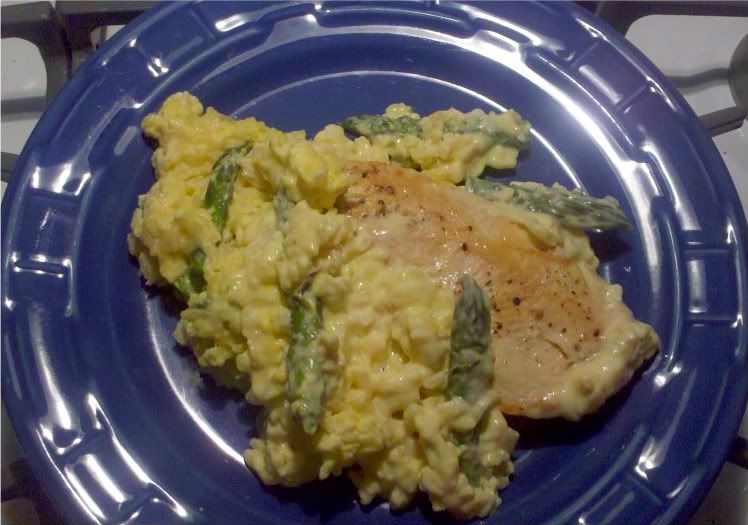
Chicken & Asparagus Risotto Skillet
This is one of my favorite all time recipes. It's ridiculously easy and yet so good. It's not a true risotto, it uses canned soup and, HORRORS! minute rice. A product I do not think my mother allowed in her kitchen. All the same this recipe is delicious and even though I now know how to make "real" risotto I am STILL also making this delicious recipe. You can double the asparagus if you want to. More asparagus is never a bad thing! This recipe originates with The Pampered Chef and dates from the era of my life when I was a consultant... It comes from the Main Dishes cookbook (which I suspect is no longer available.) You need a really big skillet, a deep 10" or even better 12 incher, with a lid.

Chicken & Asparagus Risotto Skillet
Boneless Skinless Chicken Breasts about 1 per person, split in half on the horizontal (to make them thinner & cook more evenly)
salt, to taste
ground black pepper, to taste
Olive oil
1 small onion, chopped very fine
3 garlic cloves, pressed with a garlic press, or minced
2 ounces fresh Parmesan cheese, grated, (about 1/2 cup)
1/4 teaspoon salt
1 lemon, zested
2 cups milk
1 can (10 3/4 oz.) Condensed Cream of Chicken Soup
1 bundle fresh asparagus spears, washed, trimmed & cut into pieces
2 cups instant long-grain white rice
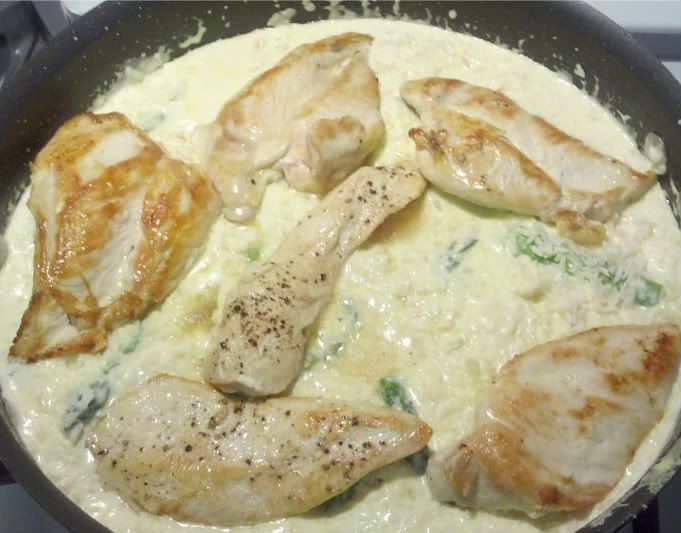
Add olive oil to pan & heat to medium heat. Season chicken breasts with salt and pepper and add to skillet cooking until no longer pink (about 6 minutes on each side.) Remove chicken from pan and reserve.

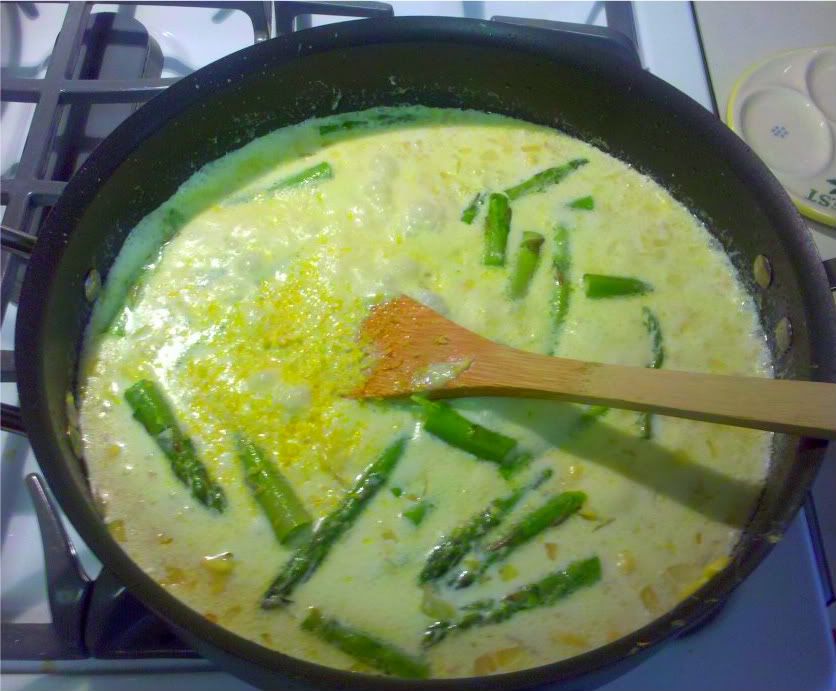
Add milk, soup, asparagus, onion, garlic, cheese, lemon zest and remaining 1/2 teaspoon salt to pan (I start with the onions & garlic so they can start cooking and dump each ingredient into the pan as I finish preparing it.) Stir everything together, bring to a boil & let simmer 3 minutes.

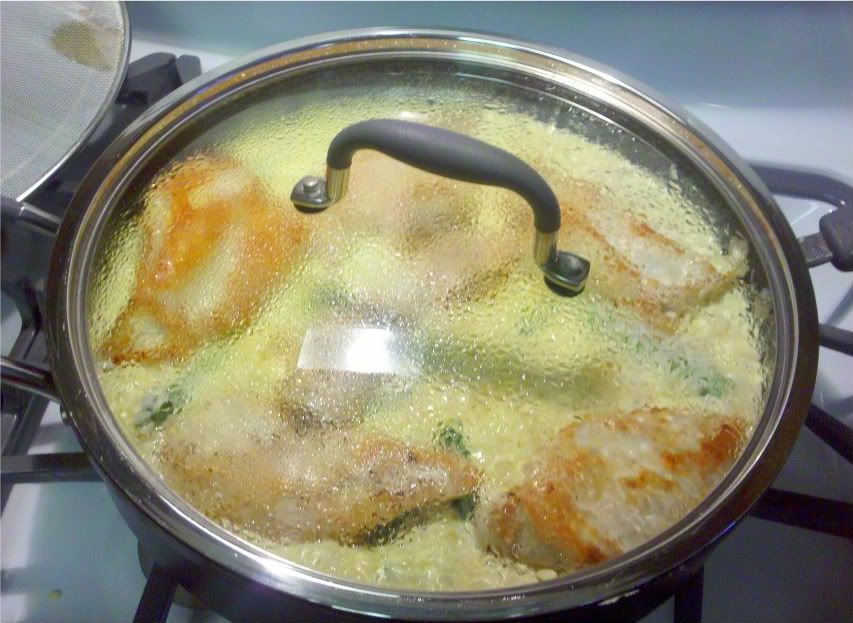
Stir in rice; top with chicken & any collected juices. Cover pan; remove from heat. Let stand 5 minutes.


Note Preparing Asparagus:
One of the reasons that a lot of people don't like asparagus is that it is so often improperly trimmed. It's really easy, my mother taught me how and this method has never done me wrong. Rinse the asparagus under cold running water and shake dry. Grasp the asparagus near the top and the bottom and bend until it breaks. The asparagus will break where the woody part of the stem ends. I don't know why or how, but Mother was right. Discard the end, sometimes a lot breaks off but trust me, you don't want to eat that part it will be woody, sinewy and unpleasant, toss it. Mother knew best! If you do it this way you need not mess about with vegetable peelers or any of that nonsense. (I wish I could show you a demonstration picture, but it takes both hands to bend the asparagus & I don't have a tripod for my camera phone.)

Note on Lemon Zest:
There are at least 2 ways to zest a lemon & either one will do, but the amount of zest you use may vary according to which method you use. If you use a rasp or micro-plane grater, you will get a powdery light zest. If you use a traditional lemon zester you will get larger strings of zest and generally it takes less zest for more flavor. In some cases if you have a very good zester which makes long strands you may want to cut them into shorter pieces with a knife. For this dish I used my micro-plane zester because - I don't know the mood struck me.... but when I am making zest for baked goods like cookies... I used my trusty lemon zester!
Now a story about zesters:
I worked for about 5 years in housewares in a major department store (The Broadway if you live on the West Coast & want to know) when I was about 20. It was very funny to observe how customers would wait for the older ladies in the department in order to ask their advise on pieces of equipment & see their astonishment as a lady of more-than-50 referred the customer to me as having more experience in that kind of cooking. Te-he-hee that was always kind-of fun.
Well anyway, I did quite a good trade in selling lemon zesters as tie-ons for Bridal Shower gifts. The Henckles gadgets were near the cash register & ladies who came in registry shopping as a group would often amuse themselves by playing "name that gadget" which each other as I was ringing up... many of them had no idea what most of the tools were (this was before The Food Network.)
The one that always stumped them was the lemon zester. Again it was fun to watch their surprise when the young whippersnapper (me) knew what it was and could tell them 3 different dishes in which they might USE a lemon zester (a credit to my wonderful cooking/baking, mother.) After 2 different groups bought zesters in order to play "stump-the-bride" at the shower... I began suggesting them as an add-on to many of my registry customers. (FYI even now, my spell-checker doesn't recognize the word zester.)
Chicken & Asparagus Risotto Skillet
Boneless Skinless Chicken Breasts about 1 per person, split in half on the horizontal (to make them thinner & cook more evenly)
salt, to taste
ground black pepper, to taste
Olive oil
1 small onion, chopped very fine
3 garlic cloves, pressed with a garlic press, or minced
2 ounces fresh Parmesan cheese, grated, (about 1/2 cup)
1/4 teaspoon salt
1 lemon, zested
2 cups milk
1 can (10 3/4 oz.) Condensed Cream of Chicken Soup
1 bundle fresh asparagus spears, washed, trimmed & cut into pieces
2 cups instant long-grain white rice
Add olive oil to pan & heat to medium heat. Season chicken breasts with salt and pepper and add to skillet cooking until no longer pink (about 6 minutes on each side.) Remove chicken from pan and reserve.

Add milk, soup, asparagus, onion, garlic, cheese, lemon zest and remaining 1/2 teaspoon salt to pan (I start with the onions & garlic so they can start cooking and dump each ingredient into the pan as I finish preparing it.) Stir everything together, bring to a boil & let simmer 3 minutes.
Stir in rice; top with chicken & any collected juices. Cover pan; remove from heat. Let stand 5 minutes.
Note Preparing Asparagus:
One of the reasons that a lot of people don't like asparagus is that it is so often improperly trimmed. It's really easy, my mother taught me how and this method has never done me wrong. Rinse the asparagus under cold running water and shake dry. Grasp the asparagus near the top and the bottom and bend until it breaks. The asparagus will break where the woody part of the stem ends. I don't know why or how, but Mother was right. Discard the end, sometimes a lot breaks off but trust me, you don't want to eat that part it will be woody, sinewy and unpleasant, toss it. Mother knew best! If you do it this way you need not mess about with vegetable peelers or any of that nonsense. (I wish I could show you a demonstration picture, but it takes both hands to bend the asparagus & I don't have a tripod for my camera phone.)

Note on Lemon Zest:
There are at least 2 ways to zest a lemon & either one will do, but the amount of zest you use may vary according to which method you use. If you use a rasp or micro-plane grater, you will get a powdery light zest. If you use a traditional lemon zester you will get larger strings of zest and generally it takes less zest for more flavor. In some cases if you have a very good zester which makes long strands you may want to cut them into shorter pieces with a knife. For this dish I used my micro-plane zester because - I don't know the mood struck me.... but when I am making zest for baked goods like cookies... I used my trusty lemon zester!
Now a story about zesters:
I worked for about 5 years in housewares in a major department store (The Broadway if you live on the West Coast & want to know) when I was about 20. It was very funny to observe how customers would wait for the older ladies in the department in order to ask their advise on pieces of equipment & see their astonishment as a lady of more-than-50 referred the customer to me as having more experience in that kind of cooking. Te-he-hee that was always kind-of fun.
Well anyway, I did quite a good trade in selling lemon zesters as tie-ons for Bridal Shower gifts. The Henckles gadgets were near the cash register & ladies who came in registry shopping as a group would often amuse themselves by playing "name that gadget" which each other as I was ringing up... many of them had no idea what most of the tools were (this was before The Food Network.)
The one that always stumped them was the lemon zester. Again it was fun to watch their surprise when the young whippersnapper (me) knew what it was and could tell them 3 different dishes in which they might USE a lemon zester (a credit to my wonderful cooking/baking, mother.) After 2 different groups bought zesters in order to play "stump-the-bride" at the shower... I began suggesting them as an add-on to many of my registry customers. (FYI even now, my spell-checker doesn't recognize the word zester.)
Friday, October 23, 2009
Packed My First Bento Lunch
About a month ago I had a post where I shared about Wendolonia, Wendy Copley, and her wonderful Bento-Box Lunches that she packs for her son Here is a link to the previous post about Wendolonia. I have been watching Wendy's site and playing with the idea of trying it since the beginning of the school year this year. Ethan's lunches have been a lot healthier this year, in part from his willingness to eat more variety and in part from my getting ideas from watching Wendolonia. I've had my eye open for Bento supplies, but haven't found any in local stores. I was getting ready to break down and get one of the more expensive boxes on Amazon... but yesterday I finally found something that would work at H.E.B. (Texas supermarket chain.)
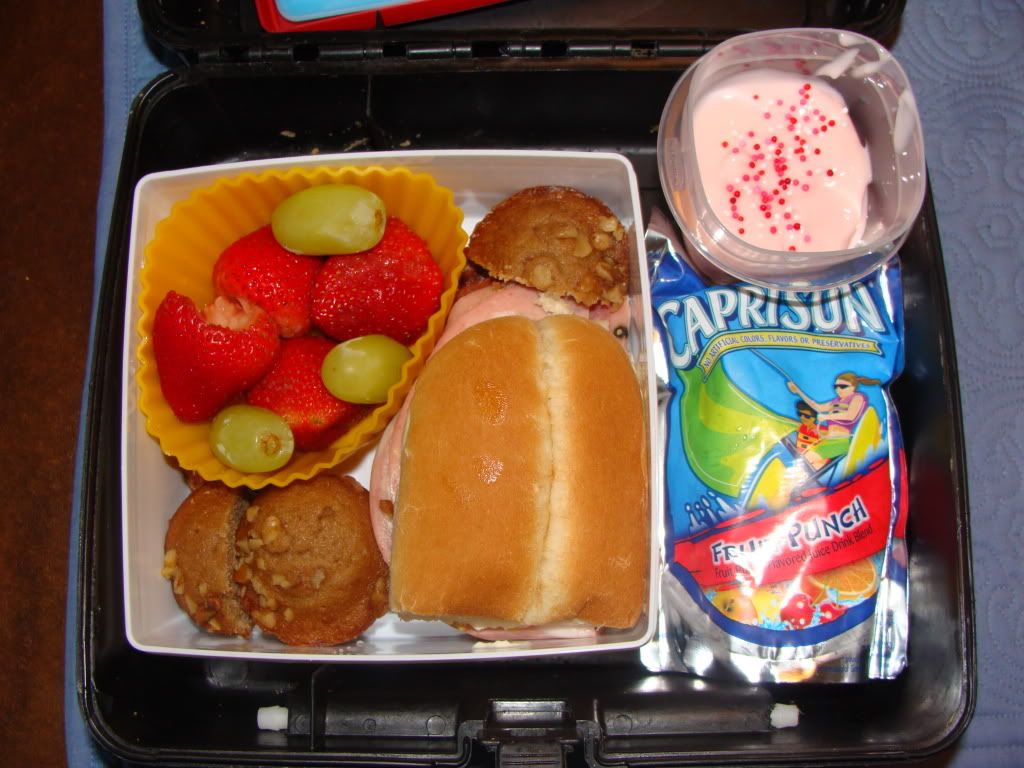
So here is my first try at packing a Bento Style lunch.
Inside the "lunch pod" is Ethan's current favorite sandwich... he is a creature of habit he wants certain things to remain the same. Ethan never would eat the bread in sandwiches until I started making them on a bun or a roll. I used to get these wonderful mini-hoagie rolls but the market quit carrying them so this is an OROWEAT French Roll cut in half, dressed with mayonnaise and spicy mustard (a newly discovered like), then stacked with Italian cold cuts: Mortadella, Genoa Salami, and Turkey Pepperoni, and today I also added a slice of Provalone cheese. In the Muffin cup I have hulled strawberries and a few grapes. Ethan loves Strawberries and doesn't eat grapes, but I thought we'd try to branch out and see if the novelty of the new lunchbox would get him to try them. Below the fruit cup is a banana nut mini-muffin, a second muffin cut in half was packed in the empty spots to try to keep the food from moving around in the box. There are also some smokehouse almonds that I tried to use to fill in space, but they feel down to the bottom and don't show. Ethan very recently discovered that he loves smokehouse almonds. The lunch pod has a lid that goes on top. I placed all inside his regular lunchbox which left just enough room for a Capri Sun and a small cup of Strawberry Cream Cheese Fruit Dip with sprinkles to make it look festive (the container has a lid too.) I had intended to pack the fruit dip in the lunch pod but the container stuck up too high to fit.

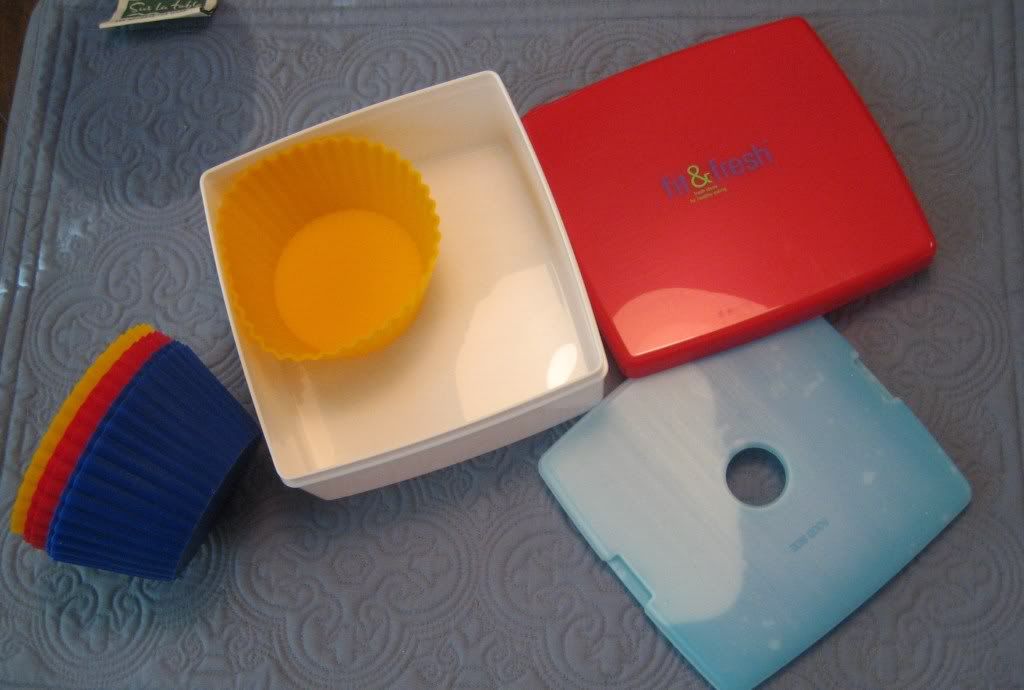
Here is the "Lunch POD" it's made by a company called fit&fresh. There is the main box and a lid and an ice pack that clips into place on the underside of the lid. I also found some Silicon cupcake holders these are Jumbo Size... the store only had Jumbo or mini-muffin size and the mini-size was too short. The silicon cups hold things in place while not allowing them to touch other foods and mix flavors. The idea is that the lid of the box fits so closely to the top of the cup that it forms a kind-of seal... I have even seen applesauce packed in a cup like that... I'm not that adventurous yet. The silicon cups were about $6.95 for a set of 6 and the Lunch POD was $6.27 both pretty reasonable especially in comparison to the prices for things I've seen online.
When I showed Robert the Lunch POD he was a little pouty that it wasn't for him, I now am charged with going back to H.E.B. to get him a fit&fresh Salad Shaker. Robert always buys lunch but if a fun container will get him to pack lunch I'm sure that will be much healthier! The website for fit&fresh is http://www.fit-fresh.com/. My previous post about bentos has links to Wendolonia's site, her FAQ page and her Lunch Box Ideas a great list of ideas of things to pack in a lunch I encourage you to check them out.
UPDATE:
Well, Ethan struggled with the fruit dip container, it was too hard to open so he didn't have much time left to eat. He only had time for the strawberries and grapes. WHAT!!! I try to act nonchalant as my grape-hating son tells me that he ate the grapes and they were really good. :)
Now to find a more user friendly way of sending the dip for the fruit...
So here is my first try at packing a Bento Style lunch.
Inside the "lunch pod" is Ethan's current favorite sandwich... he is a creature of habit he wants certain things to remain the same. Ethan never would eat the bread in sandwiches until I started making them on a bun or a roll. I used to get these wonderful mini-hoagie rolls but the market quit carrying them so this is an OROWEAT French Roll cut in half, dressed with mayonnaise and spicy mustard (a newly discovered like), then stacked with Italian cold cuts: Mortadella, Genoa Salami, and Turkey Pepperoni, and today I also added a slice of Provalone cheese. In the Muffin cup I have hulled strawberries and a few grapes. Ethan loves Strawberries and doesn't eat grapes, but I thought we'd try to branch out and see if the novelty of the new lunchbox would get him to try them. Below the fruit cup is a banana nut mini-muffin, a second muffin cut in half was packed in the empty spots to try to keep the food from moving around in the box. There are also some smokehouse almonds that I tried to use to fill in space, but they feel down to the bottom and don't show. Ethan very recently discovered that he loves smokehouse almonds. The lunch pod has a lid that goes on top. I placed all inside his regular lunchbox which left just enough room for a Capri Sun and a small cup of Strawberry Cream Cheese Fruit Dip with sprinkles to make it look festive (the container has a lid too.) I had intended to pack the fruit dip in the lunch pod but the container stuck up too high to fit.
Here is the "Lunch POD" it's made by a company called fit&fresh. There is the main box and a lid and an ice pack that clips into place on the underside of the lid. I also found some Silicon cupcake holders these are Jumbo Size... the store only had Jumbo or mini-muffin size and the mini-size was too short. The silicon cups hold things in place while not allowing them to touch other foods and mix flavors. The idea is that the lid of the box fits so closely to the top of the cup that it forms a kind-of seal... I have even seen applesauce packed in a cup like that... I'm not that adventurous yet. The silicon cups were about $6.95 for a set of 6 and the Lunch POD was $6.27 both pretty reasonable especially in comparison to the prices for things I've seen online.
When I showed Robert the Lunch POD he was a little pouty that it wasn't for him, I now am charged with going back to H.E.B. to get him a fit&fresh Salad Shaker. Robert always buys lunch but if a fun container will get him to pack lunch I'm sure that will be much healthier! The website for fit&fresh is http://www.fit-fresh.com/. My previous post about bentos has links to Wendolonia's site, her FAQ page and her Lunch Box Ideas a great list of ideas of things to pack in a lunch I encourage you to check them out.
UPDATE:
Well, Ethan struggled with the fruit dip container, it was too hard to open so he didn't have much time left to eat. He only had time for the strawberries and grapes. WHAT!!! I try to act nonchalant as my grape-hating son tells me that he ate the grapes and they were really good. :)
Now to find a more user friendly way of sending the dip for the fruit...
Thursday, August 27, 2009
Rice Keeper
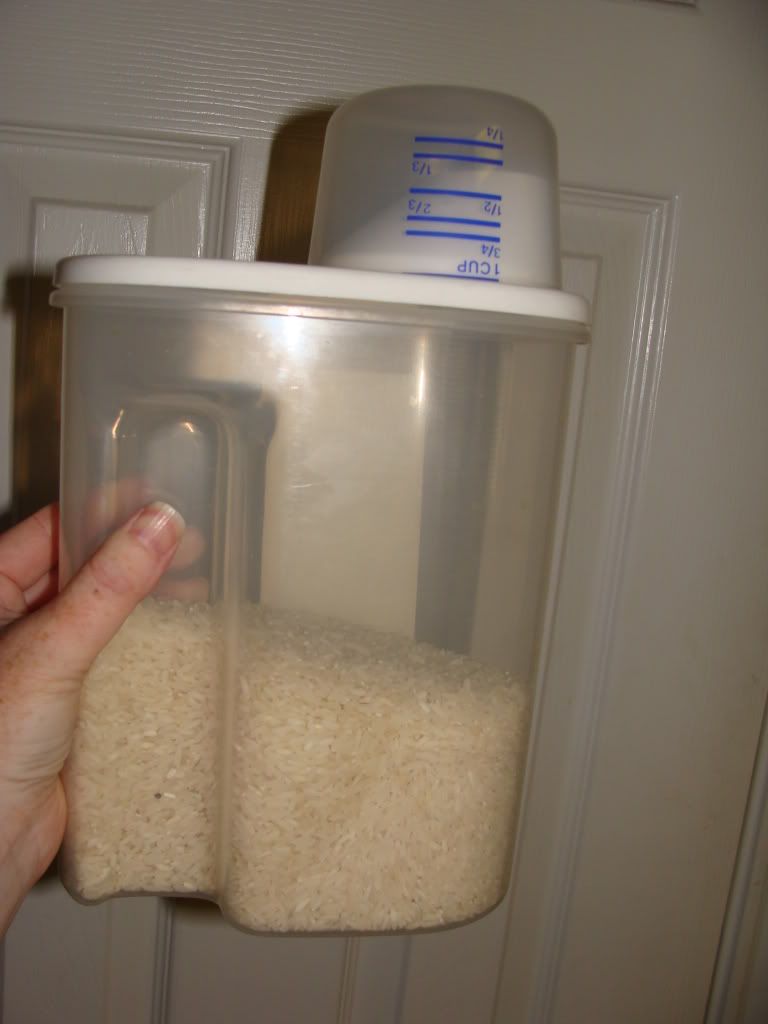 Since I have recently been talking about rice, I have to tell you about my rice keeper. I love this thing! It keeps the rice contained & fresh, has a pour spout and a meausuring cup cap. I have 2 of them now, one for regular long-grain rice and a 2nd for Basmati rice (I cut the cooking directions off the bag of basmati and keep it in the container because I can never remember the proportions of liquid to rice.) Originally I got this at the supermarket, but I had to go to The Container Store to get the 2nd one.
Subscribe to:
Posts (Atom)
